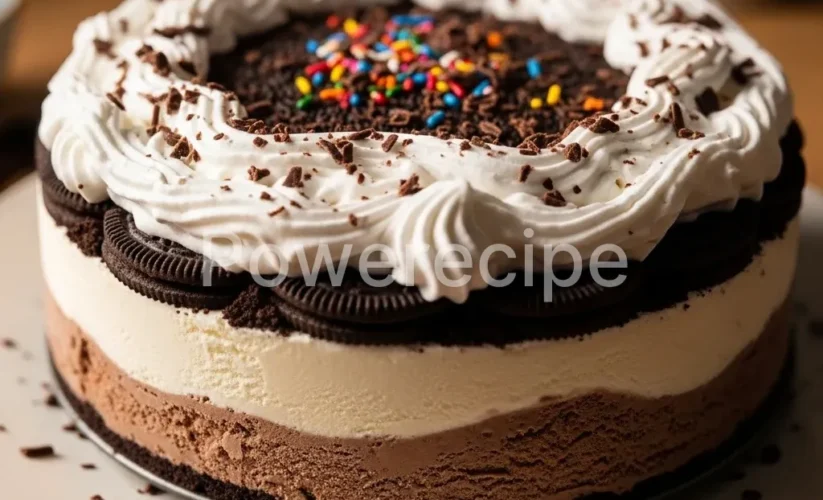
Ice Cream Cake
The smell of freshly mown grass and the sound of little giggles usually mean summer is in full swing at our house. For my three kiddos, it also signals one very important thing: birthday season! With birthdays often falling close together, I’ve learned to master crowd-pleasing desserts that don’t keep me chained to the oven.
That’s where this incredible homemade ice cream cake comes into its own. I remember the first time I made one; it was for my eldest, Liam, who wanted something “super cool and totally different” for his 7th birthday. We usually did a classic chocolate cake, but his request sparked an idea.
I thought, “Why not combine two loves: ice cream and cake?” The result was pure magic. His eyes lit up, his friends devoured it, and honestly, so did the adults! From that day on, a variation of this easy ice cream cake has become a staple at every summer celebration. It’s simple, it’s refreshing, and it truly embodies that “food is love” philosophy without making me stress in the kitchen.
Why You’ll Love This Recipe
This isn’t just any dessert; it’s a memory maker! You will absolutely adore this ice cream cake recipe because it brings joy with minimal effort. As a mom constantly juggling school runs, playdates, and dinner prep, I prioritize recipes that deliver maximum impact for minimum fuss.
This frozen dessert fits the bill perfectly. It’s incredibly customizable, letting you cater to everyone’s favorite flavors. Imagine the smile on your child’s face when they see a homemade ice cream cake tailored just for them!
Furthermore, it’s a fantastic make-ahead option, freeing up your party day for fun instead of baking. No more last-minute dessert dashes to the store. You simply assemble, freeze, and enjoy.
This easy ice cream cake is also perfect for cooling down on a hot day, offering a delightful contrast of textures and temperatures. It’s truly a celebration in every single slice.
Ingredients You’ll Need
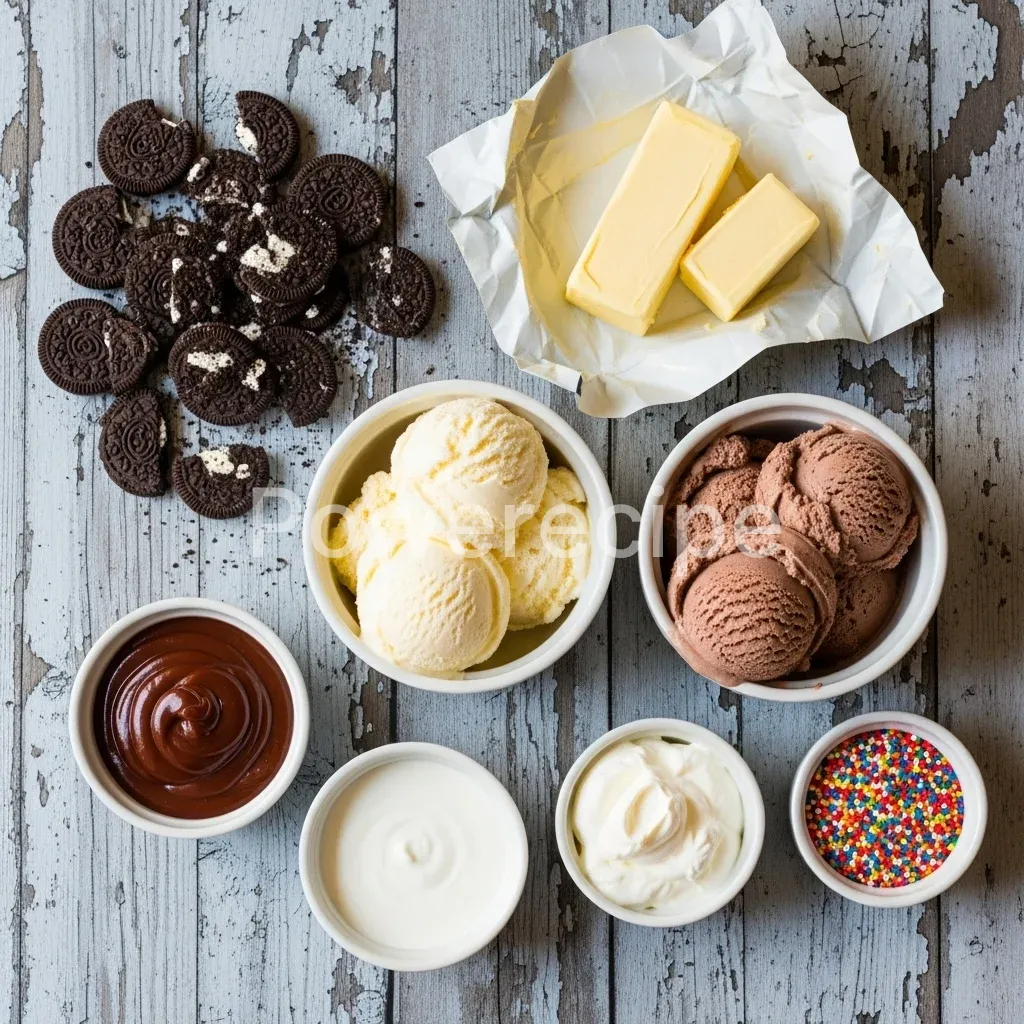
Making your own delicious ice cream cake requires just a few simple, accessible ingredients. You likely have some of these in your pantry already! We’ll create a sturdy base, a creamy, dreamy filling, and a delightful topping. The beauty of this recipe lies in its flexibility; feel free to choose your family’s favorite brands and flavors.
| Ingredient | Quantity | Notes |
|---|---|---|
| Chocolate Sandwich Cookies (e.g., Oreos) | 1 (14.3-ounce) package | For the crust |
| Unsalted Butter, melted | 6 tablespoons | Binds the crust |
| Vanilla Ice Cream, softened | 1.75 quarts (approx. 7 cups) | High-quality for best results |
| Chocolate Ice Cream, softened | 1.75 quarts (approx. 7 cups) | Or any second flavor you prefer |
| Hot Fudge Topping | 1 (12-ounce) jar | Or chocolate ganache |
| Whipped Topping (e.g., Cool Whip) | 1 (8-ounce) container, thawed | Homemade whipped cream works too! |
| Sprinkles, chocolate shavings, or candy pieces | Optional, for garnish | Get creative! |
Substitutions & Variations
This is where the real fun begins! One of the reasons I adore making this ice cream cake is how easily you can adapt it to any taste, occasion, or dietary need.
* Crust Creativity: Don’t limit yourself to chocolate sandwich cookies! Graham cracker crumbs mixed with melted butter create a classic cheesecake-like crust. For a peanut butter lover, use crushed Nutter Butter cookies.
Gluten-free? Simply opt for gluten-free chocolate cookies or a nut-based crust (almonds or walnuts pulsed with a little sugar and butter).
* Ice Cream Adventure: The sky’s the limit here!
Instead of vanilla and chocolate, imagine a strawberry cheesecake ice cream cake, or a mint chocolate chip delight. Coffee ice cream layers beautifully with chocolate. For a more sophisticated twist, try pistachio and raspberry.
You can even swirl in a third flavor or add chunks of candy bars, cookie dough, or fresh fruit between layers. For a dairy-free ice cream cake, use your favorite non-dairy ice cream brands made from almond, coconut, or oat milk.
* Sauce Sensations: Beyond hot fudge, consider caramel sauce, strawberry sauce, or even a homemade berry compote.
A drizzle of peanut butter sauce adds an unexpected richness.
* Mix-ins & Toppings Galore: This is your chance to really personalize your ice cream cake. Crushed candies (Snickers, Reese’s, M&Ms), chopped nuts, mini chocolate chips, shredded coconut, or even fresh fruit like sliced strawberries or raspberries can be folded into the ice cream layers or sprinkled on top.
Kids especially love adding their favorite sprinkles!
* Lighter Options: For a slightly “lighter” version, you can use low-fat ice cream or sorbet in place of one of the ice cream layers. Incorporate plenty of fresh berries for natural sweetness and vibrant color. This still gives you a wonderful frozen dessert without feeling too indulgent.
While exploring creative crusts and flavor combinations for your ice cream cake, don’t forget the endless possibilities desserts offer. For another delightful and equally adaptable sweet treat, consider the many lemon pudding cake recipe benefits that can brighten any meal.
Step-by-Step Instructions
Making this homemade ice cream cake is far simpler than you might think. Follow these clear steps, and you’ll have a show-stopping dessert ready for the freezer. Remember, patience with freezing times is your secret ingredient!
Note: This video is for demonstration purposes and may use a slightly different method.
1. Prepare Your Pan: Lightly grease a 9-inch springform pan. Line the bottom with parchment paper for easy removal.
This is a crucial step for a beautiful, intact ice cream cake.
2. Make the Cookie Crust: In a food processor, pulse the chocolate sandwich cookies until finely ground.
Alternatively, place them in a zip-top bag and crush them with a rolling pin. Transfer the crumbs to a medium bowl and stir in the melted butter until well combined. Press the mixture firmly and evenly into the bottom of the prepared springform pan.
3. Freeze the Crust: Place the pan with the crust into the freezer for at least 15-20 minutes. This helps the crust set and prevents it from crumbling when you add the ice cream.
4. First Ice Cream Layer: While the crust chills, let your first ice cream flavor (e.g., vanilla) soften slightly at room temperature for about 10-15 minutes. It should be pliable enough to spread but not melted.
Spoon the softened vanilla ice cream over the frozen crust, spreading it evenly to the edges. Smooth the top with an offset spatula or the back of a spoon.
5.
Freeze First Layer: Return the pan to the freezer for at least 1 hour, or until the ice cream layer is firm. This ensures clean layers for your beautiful ice cream cake.
6.
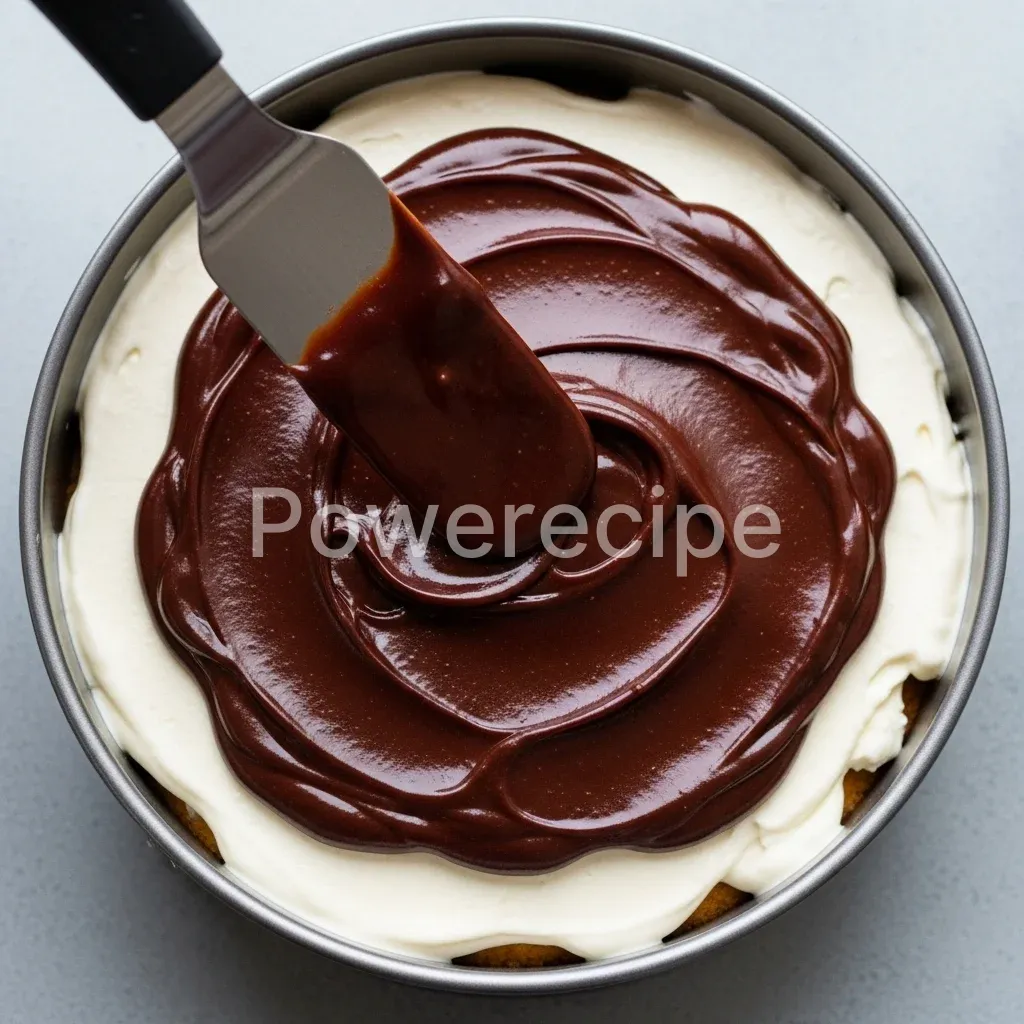
Add Hot Fudge Layer: Once the vanilla ice cream is firm, evenly spread about half of the hot fudge topping over it. If your fudge is too thick, microwave it for a few seconds to make it more spreadable. Freeze again for another 30 minutes to firm up the fudge.
7. Second Ice Cream Layer: Soften your second ice cream flavor (e.g., chocolate) as you did the first. Carefully spread it over the firm hot fudge layer, smoothing the top.
8. Final Freeze: Cover the springform pan tightly with plastic wrap and freeze the ice cream cake for a minimum of 6 hours, or ideally, overnight. This long freeze is essential for a firm, easy-to-slice cake.
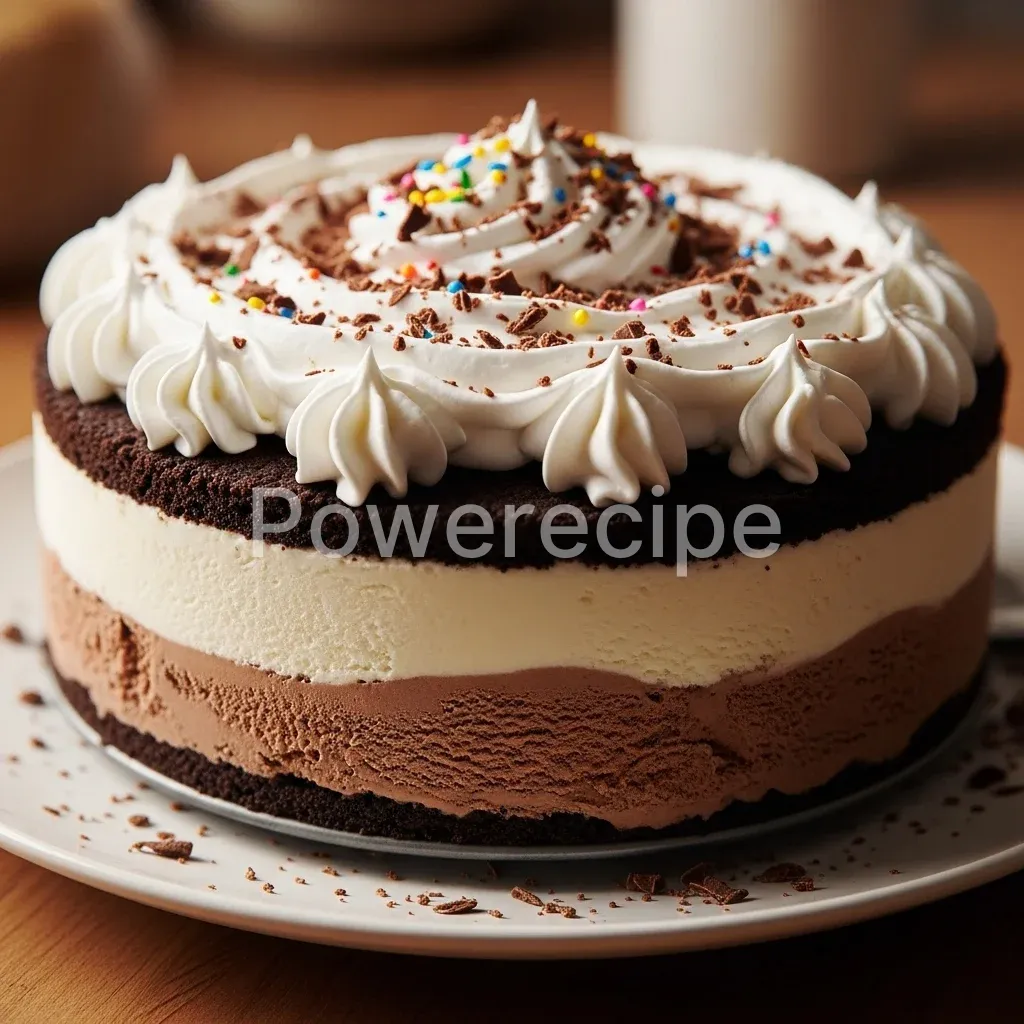
9. Decorate and Serve: When ready to serve, remove the cake from the freezer. Let it sit at room temperature for about 10-15 minutes to soften just slightly.
This makes slicing much easier. Carefully remove the sides of the springform pan. Frost the top and sides of the cake with thawed whipped topping.
Drizzle with the remaining hot fudge and decorate with sprinkles or other desired toppings. Slice with a sharp knife dipped in hot water for clean cuts. Enjoy your glorious homemade ice cream cake!
Pro Tips for Success
Making a show-stopping ice cream cake is all about a few clever tricks that elevate it from good to absolutely fantastic. I’ve learned these over many celebratory dessert creations!
* Perfectly Softened Ice Cream: This is perhaps the most critical tip. You want your ice cream soft enough to spread easily, but not so melted that it turns soupy. It should resemble soft-serve.
If it’s too hard, it will be lumpy and difficult to spread; too soft, and your layers will bleed. Take it out 10-15 minutes before you plan to use it, checking its consistency frequently.
* Chill Everything: Make sure your springform pan is cool, your crust is thoroughly frozen, and each ice cream layer is firm before adding the next.
This layered freezing prevents colors from mixing and ensures distinct, beautiful strata in your ice cream cake.
* Grease and Line: Don’t skip greasing and lining the bottom of your springform pan with parchment paper. This simple step makes releasing the cake incredibly easy and prevents any sticking.
* Smooth Operator: For smooth layers, use an offset spatula or the back of a large spoon. Warm the spatula slightly with hot water if needed to help glide it across the ice cream.
* Tight Covering is Key: After assembling, cover your ice cream cake tightly with at least two layers of plastic wrap, pressing it directly onto the surface of the cake.
This prevents freezer burn and keeps your cake tasting fresh.
* Hot Knife for Clean Slices: When it’s time to serve, dip a long, sharp knife into hot water, wipe it clean, and then slice. Repeat this process for each slice.
This creates clean, professional-looking portions of your ice cream cake.
* Prepare Ahead: This recipe is a dream for meal prep! Make your ice cream cake a day or two in advance. This gives it plenty of time to freeze solid and allows you to focus on other party preparations.
Achieving a “show-stopping” ice cream cake often involves mastering techniques like ensuring your ice cream is perfectly softened for a smooth spread. Similarly, understanding specific dietary needs can elevate your baking, especially when preparing gluten egg free desserts that cater to everyone.
Storage & Reheating Tips
An ice cream cake is a frozen delight, so storage is crucial to maintain its texture and flavor. There’s no “reheating” with this dessert, only keeping it perfectly chilled!
* Airtight is Best: Once assembled and decorated, if you have leftovers (which is rare in my house!), place the cake back into the springform pan or transfer individual slices to an airtight container. Wrap the entire cake or container securely with several layers of plastic wrap, followed by aluminum foil. This dual layer protection guards against freezer burn and prevents it from absorbing any unwanted odors from your freezer.
* Optimal Freezer Life: A properly stored homemade ice cream cake will maintain its quality for up to 1-2 weeks in a standard freezer. Beyond that, the texture might start to degrade slightly, and ice crystals could form.
* Serving from Freezer: When you’re ready to enjoy another slice, take the entire cake out of the freezer about 10-15 minutes before serving.
This brief time at room temperature allows the ice cream and crust to soften slightly, making it much easier to slice and enjoy. Don’t let it sit out too long, though, or it will start to melt!
* Individual Slices: For convenience, you can pre-slice your ice cream cake before its final freeze.
Then, wrap each slice individually in plastic wrap. This way, you can grab just one portion without thawing the entire cake.
What to Serve With This Recipe
Honestly, this homemade ice cream cake is such a star, it truly shines on its own! It’s a complete dessert experience – rich, creamy, crunchy, and cool. You don’t need much to accompany it.
However, if you’re looking to elevate the experience or round out a special occasion, here are a few simple ideas:
* A Simple Beverage: A cup of freshly brewed coffee, a glass of cold milk (especially for the kids!), or even a sparkling water with a hint of lemon or lime can be perfect. The coffee provides a lovely counterpoint to the sweetness of the ice cream cake.
* Fresh Fruit: A small side of lightly sweetened fresh berries (strawberries, raspberries, blueberries) offers a refreshing contrast.
The tartness of the fruit can cut through the richness of the ice cream and add a pop of natural color.
* Mini Meringues: A few delicate mini meringues on the side can add an extra airy, crisp texture.
* Chocolate Dipped Strawberries: A classic pairing that feels elegant but requires minimal effort.
* Good Company: Ultimately, the best accompaniment to a delicious homemade ice cream cake is the laughter and joy of friends and family gathered around the table. Food is love, after all!
While this homemade ice cream cake is a complete dessert experience, sometimes you’re planning an entire day’s menu for a special occasion. For instance, if you’re thinking about starting the day with something equally satisfying and wholesome, explore some healthy breakfast sausage recipes to round out your meal planning.
FAQs
Can I make an ice cream cake ahead of time?
Absolutely! In fact, making your ice cream cake ahead of time is highly recommended. It needs a good long freeze (at least 6 hours, but ideally overnight) to set up perfectly.
You can easily prepare it 1-2 days in advance, keeping it tightly wrapped in the freezer until you’re ready to serve. This makes party planning so much easier!
How do I prevent my ice cream cake from melting too fast?
The key to preventing quick melting is ensuring your ice cream cake is thoroughly frozen before serving. Keep it in the coldest part of your freezer until just before you need it. When serving, work quickly.
A brief 10-15 minute rest at room temperature is enough to soften it for slicing; any longer, and it will start to melt too much. Return any leftovers to the freezer immediately.
What kind of pan works best for ice cream cake?
A 9-inch springform pan is truly the best choice for making a beautiful ice cream cake. Its removable sides make it incredibly easy to release the cake without damaging any of the delicate layers. If you don’t have one, a regular 9×2-inch round cake pan lined with parchment paper, leaving an overhang to lift the cake out, can also work, but it’s a bit trickier.
Can I make a no-bake ice cream cake?
Yes, this recipe is inherently a no-bake ice cream cake! The only “cooking” involved is melting a little butter for the crust. The rest is simply assembling and freezing. This makes it a fantastic recipe for summer when you want to avoid turning on the oven, or for anyone who loves easy, stress-free desserts.
How long does homemade ice cream cake last in the freezer?
When properly stored in an airtight container or tightly wrapped with plastic wrap and foil, your homemade ice cream cake will last in the freezer for up to 1-2 weeks. Beyond that, it might start to develop ice crystals and lose some of its fresh texture, although it would still be safe to eat.
Ice cream cakes are popular frozen desserts, often consisting of layers of ice cream, cake, and various toppings, providing a delightful contrast of textures and temperatures. These celebratory treats are frequently enjoyed at birthdays and other special events, making them a versatile option for any occasion where a cool, sweet indulgence is desired, as detailed further on ice cream cakes.
Nutrition Information (per serving)
Please note that this nutrition information is an estimate based on the ingredients listed and will vary depending on the specific brands of ice cream, cookies, and toppings you choose, as well as the size of your servings. A typical ice cream cake is a treat meant for enjoyment, and these figures reflect that.
| Nutrient | Amount (Estimated) |
|---|---|
| Calories | 450-550 kcal |
| Total Fat | 25-35g |
| Saturated Fat | 15-20g |
| Cholesterol | 50-70mg |
| Sodium | 200-300mg |
| Total Carbohydrates | 50-70g |
| Dietary Fiber | 1-3g |
| Total Sugars | 40-60g |
| Protein | 5-8g |
ice cream cake
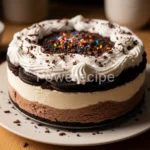
This easy, no-bake homemade ice cream cake is a customizable, crowd-pleasing dessert perfect for summer celebrations. It features a delicious cookie crust, layers of vanilla and chocolate ice cream, and hot fudge, topped with whipped cream and sprinkles. A fantastic make-ahead option, it offers delightful textures and flavors with minimal effort, making it ideal for any party.
- Prep Time: 20 mins
- Cook Time: 0 mins
- Total Time: 8 hours
- Yield: 12 servings
- Category: Dessert
- Method: No-Bake, Freezing
- Cuisine: American
Ingredients
1 (14.3-ounce) package Chocolate Sandwich Cookies
6 tablespoons Unsalted Butter
1.75 quarts Vanilla Ice Cream
1.75 quarts Chocolate Ice Cream
1 (12-ounce) jar Hot Fudge Topping
1 (8-ounce) container Whipped Topping
Sprinkles, chocolate shavings, or candy pieces
Instructions
- Lightly grease a 9-inch springform pan. Line the bottom with parchment paper for easy removal
- In a food processor, pulse the chocolate sandwich cookies until finely ground. Alternatively, place them in a zip-top bag and crush them with a rolling pin. Transfer the crumbs to a medium bowl and stir in the melted butter until well combined. Press the mixture firmly and evenly into the bottom of the prepared springform pa
- Place the pan with the crust into the freezer for at least 15-20 minutes
- While the crust chills, let your first ice cream flavor (e.g., vanilla) soften slightly at room temperature for about 10-15 minutes. It should be pliable enough to spread but not melted. Spoon the softened vanilla ice cream over the frozen crust, spreading it evenly to the edges. Smooth the top with an offset spatula or the back of a spoo
- Return the pan to the freezer for at least 1 hour, or until the ice cream layer is firm
- Once the vanilla ice cream is firm, evenly spread about half of the hot fudge topping over it. If your fudge is too thick, microwave it for a few seconds to make it more spreadable. Freeze again for another 30 minutes to firm up the fudge
- Soften your second ice cream flavor (e.g., chocolate) as you did the first. Carefully spread it over the firm hot fudge layer, smoothing the top
- Cover the springform pan tightly with plastic wrap and freeze the ice cream cake for a minimum of 6 hours, or ideally, overnight
- When ready to serve, remove the cake from the freezer. Let it sit at room temperature for about 10-15 minutes to soften just slightly. This makes slicing much easier. Carefully remove the sides of the springform pan. Frost the top and sides of the cake with thawed whipped topping. Drizzle with the remaining hot fudge and decorate with sprinkles or other desired toppings. Slice with a sharp knife dipped in hot water for clean cuts. Enjoy your glorious homemade ice cream cake!
Notes
Perfectly soften ice cream: Ensure ice cream is soft enough to spread (like soft-serve), but not melted. Take it out 10-15 minutes before use, checking consistency frequently.
Chill everything: Ensure crust and each ice cream layer are thoroughly frozen before adding the next to prevent mixing and create distinct layers.
Grease and line: Always grease and line the bottom of the springform pan with parchment paper for incredibly easy cake release and to prevent sticking.
Smooth layers: For smooth layers, use an offset spatula or the back of a large spoon. Warm the spatula slightly with hot water if needed.
Prevent freezer burn: After assembling, cover your ice cream cake tightly with at least two layers of plastic wrap, pressing it directly onto the surface.
Clean slices: When serving, dip a long, sharp knife into hot water, wipe it clean, and then slice. Repeat this process for each slice for professional-looking portions.
Make ahead: This recipe is ideal for meal prep; make your ice cream cake a day or two in advance to allow plenty of time to freeze solid.
Storage: Store properly wrapped in an airtight container or the springform pan with several layers of plastic wrap and foil for up to 1-2 weeks in the freezer.
Serving leftovers: For convenience, you can pre-slice your ice cream cake before its final freeze and wrap each slice individually to grab just one portion without thawing the entire cake.