
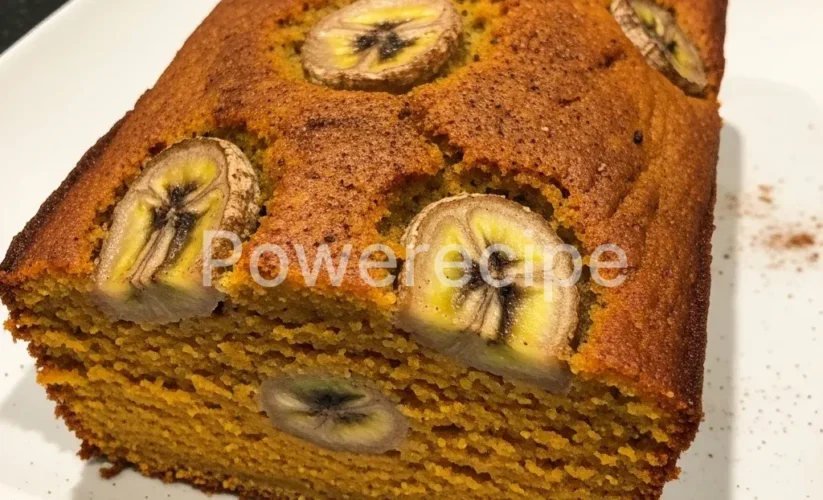
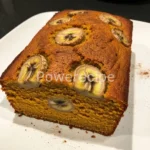
Pumpkin Banana Loaf
When my kids were little, mornings felt like a tornado of mismatched socks, forgotten lunchboxes, and the endless quest for a second cup of coffee. One crisp autumn day, I found myself staring at a pile of overly ripe bananas on the counter, a half-used can of pumpkin puree in the fridge, and a sudden craving for something comforting, something that smelled like home. That’s how this incredible pumpkin banana loaf was born.
It became an instant hit, a warm hug in a slice, and a delicious way to use up those brown bananas. There’s something truly magical about the way the sweet earthiness of pumpkin blends with the rich banana flavor, all spiced with a hint of cinnamon and nutmeg. My kitchen fills with the most amazing aroma as this pumpkin banana loaf bakes, a smell that instantly signals coziness and love.
It’s a simple recipe, yet it delivers profound deliciousness, perfect for busy mornings, afternoon snacks, or even a wholesome dessert. This pumpkin banana loaf isn’t just a recipe; it’s a memory maker, a testament to how simple ingredients can create something extraordinary for your family.
Why You’ll Love This Pumpkin Banana Loaf Recipe
You will adore this pumpkin banana loaf for so many reasons! First, it’s incredibly easy to make. You don’t need any fancy equipment or complicated techniques.
You just mix, pour, and bake. Second, it uses up those ripe bananas sitting on your counter, minimizing food waste and maximizing flavor. Third, this pumpkin banana loaf truly embodies fall flavors, but honestly, it’s wonderful any time of year.
The combination of pumpkin and banana creates a moist, tender crumb that simply melts in your mouth. Furthermore, it offers a healthier-ish alternative to many baked goods, packing in some fruit and a bit of veggie goodness. My kids devour this pumpkin banana loaf, and I feel good knowing they enjoy a wholesome treat.
It’s truly a versatile quick bread, perfect for breakfast with your coffee, a quick snack, or a light dessert. Everyone always asks for the recipe for this fantastic pumpkin banana loaf!
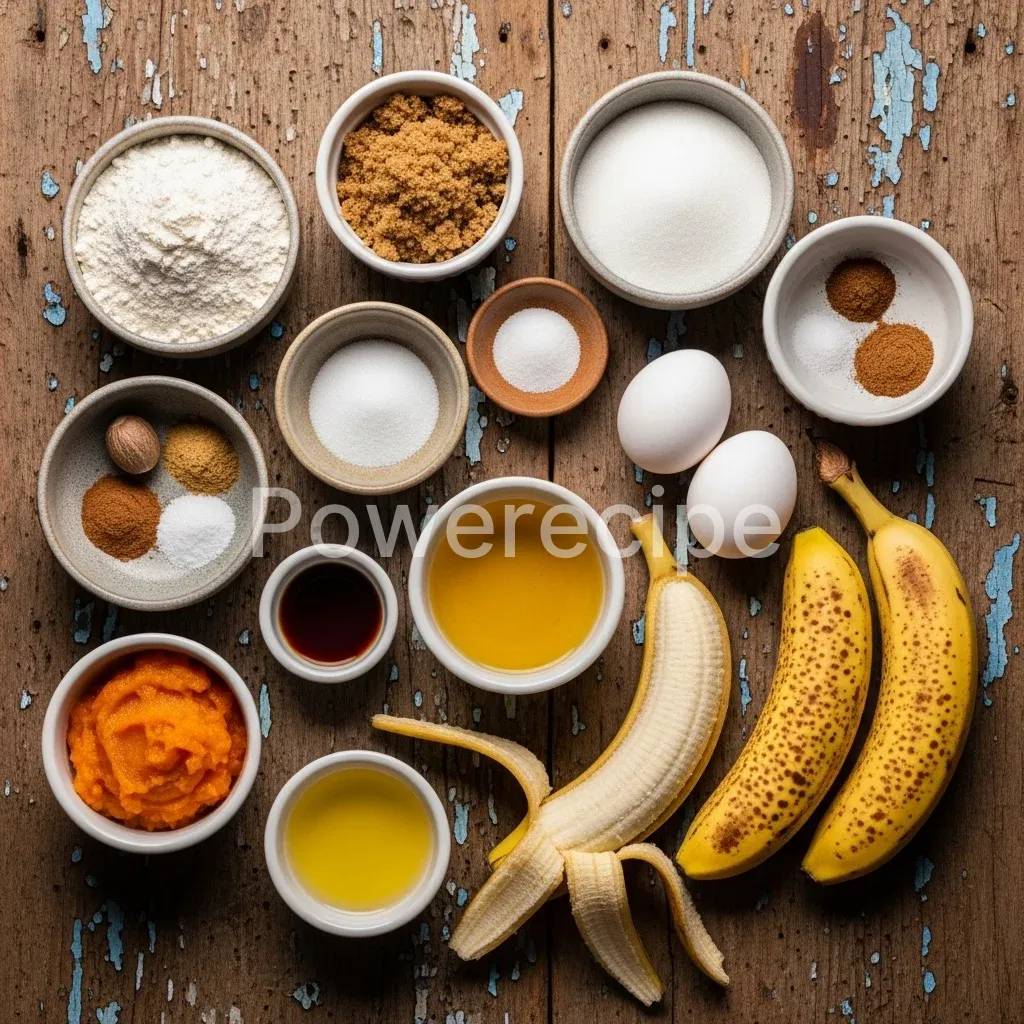
Ingredients You’ll Need
Making this delicious pumpkin banana loaf requires simple pantry staples. Gather these ingredients, and you’re well on your way to baking perfection.
| Ingredient | Quantity |
|---|---|
| All-purpose flour | 1 ¾ cups |
| Granulated sugar | ½ cup |
| Brown sugar (packed) | ½ cup |
| Baking soda | 1 teaspoon |
| Salt | ½ teaspoon |
| Ground cinnamon | 1 teaspoon |
| Ground nutmeg | ½ teaspoon |
| Ground ginger | ¼ teaspoon |
| Large eggs | 2, lightly beaten |
| Canned pumpkin puree | 1 cup (not pumpkin pie filling) |
| Ripe mashed bananas | 1 cup (about 2-3 medium) |
| Vegetable oil or melted unsalted butter | ½ cup |
| Vanilla extract | 1 teaspoon |
Substitutions & Variations
This pumpkin banana loaf recipe is incredibly forgiving and adaptable. Feel free to play around with different add-ins and substitutions to make it your own!
* Flour Power: You can substitute up to half of the all-purpose flour with whole wheat pastry flour for an extra boost of fiber. I sometimes do this to make the pumpkin banana loaf even more nourishing.
* Sweetener Swaps: For a slightly less sweet loaf, reduce the sugar by ¼ cup.
You can also experiment with maple syrup or honey, though the texture might change slightly.
* Spice It Up: If you love more spice, add ¼ teaspoon of ground cloves or a pinch of allspice to your pumpkin banana loaf. A store-bought pumpkin pie spice blend also works beautifully as a substitute for the individual spices.
* Add-ins Galore:
* Chocolate Chips: Stir in ½ to 1 cup of semi-sweet, milk, or dark chocolate chips. Chocolate and pumpkin banana loaf are a match made in heaven!
* Nuts: Add ½ cup of chopped walnuts or pecans for a delightful crunch.
Toast them first for even more flavor.
* Dried Fruit: Incorporate ½ cup of raisins, cranberries, or chopped dates.
* Coconut: Shredded coconut adds a lovely tropical hint to this pumpkin banana loaf.
* Dairy-Free Option: Simply use vegetable oil instead of melted butter, and this pumpkin banana loaf becomes dairy-free.
* Gluten-Free: Use a 1:1 gluten-free baking flour blend for a gluten-free version of this delightful pumpkin banana loaf. Make sure your blend contains xanthan gum.
* Egg Substitute: For an egg-free loaf, use flax eggs (1 tablespoon ground flaxseed meal + 3 tablespoons water per egg) or your favorite commercial egg replacer. This might alter the texture slightly, but your pumpkin banana loaf will still be delicious.
Just as you can make this pumpkin banana loaf more nourishing with ingredient swaps, optimizing other recipes for health is equally simple. If you’re looking for more ways to incorporate fiber and healthy fats into your diet, especially for weight management, consider our collection of bariatric seed recipes for weight loss.
Step-by-Step Instructions
Making this amazing pumpkin banana loaf is straightforward. Just follow these simple steps for a perfect result every time.
Note: This video is for demonstration purposes and may use a slightly different method.
1. Prepare Your Pan and Oven: Preheat your oven to 350°F (175°C). Grease and flour a 9×5-inch loaf pan, or line it with parchment paper, leaving an overhang on the long sides for easy lifting.
This ensures your pumpkin banana loaf won’t stick.
2. Combine Dry Ingredients: In a large bowl, whisk together the all-purpose flour, granulated sugar, brown sugar, baking soda, salt, cinnamon, nutmeg, and ginger.
Make sure there are no lumps of brown sugar. Mixing these thoroughly now helps distribute the flavors evenly throughout your pumpkin banana loaf.
3.
Mash the Bananas: In a separate medium bowl, mash your ripe bananas well with a fork. You want about 1 cup of mashed banana. A few small lumps are perfectly fine and add character to the pumpkin banana loaf.
4. Whisk Wet Ingredients: To the mashed bananas, add the lightly beaten eggs, pumpkin puree, vegetable oil (or melted butter), and vanilla extract. Whisk these wet ingredients together until they are well combined and smooth.
This creates the moist base for your pumpkin banana loaf.
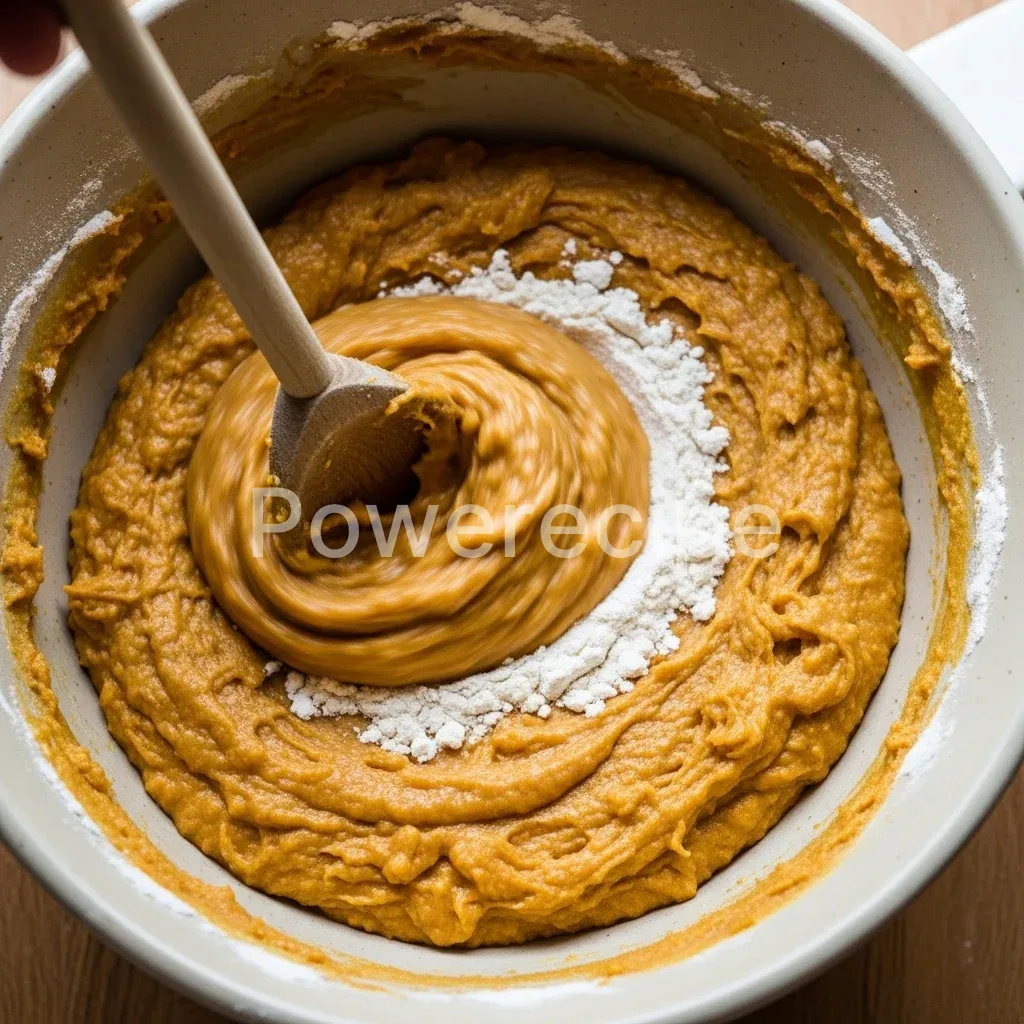
5. Combine Wet and Dry: Pour the wet ingredients into the bowl with the dry ingredients.
Stir gently with a spatula or wooden spoon until just combined. Be careful not to overmix! Overmixing develops the gluten too much, leading to a tough pumpkin banana loaf.
A few streaks of flour are acceptable. If adding any variations like chocolate chips or nuts, fold them in now.
6.
Pour into Pan: Scrape the batter evenly into your prepared loaf pan. Smooth the top with your spatula.
7.
Bake: Place the loaf pan in the preheated oven. Bake for 55-70 minutes, or until a wooden skewer or toothpick inserted into the center of the pumpkin banana loaf comes out clean or with moist crumbs attached. Baking times can vary depending on your oven, so keep an eye on it.
8. Cool: Once baked, remove the pumpkin banana loaf from the oven. Let it cool in the pan on a wire rack for about 10-15 minutes.
This cooling period allows the loaf to set.
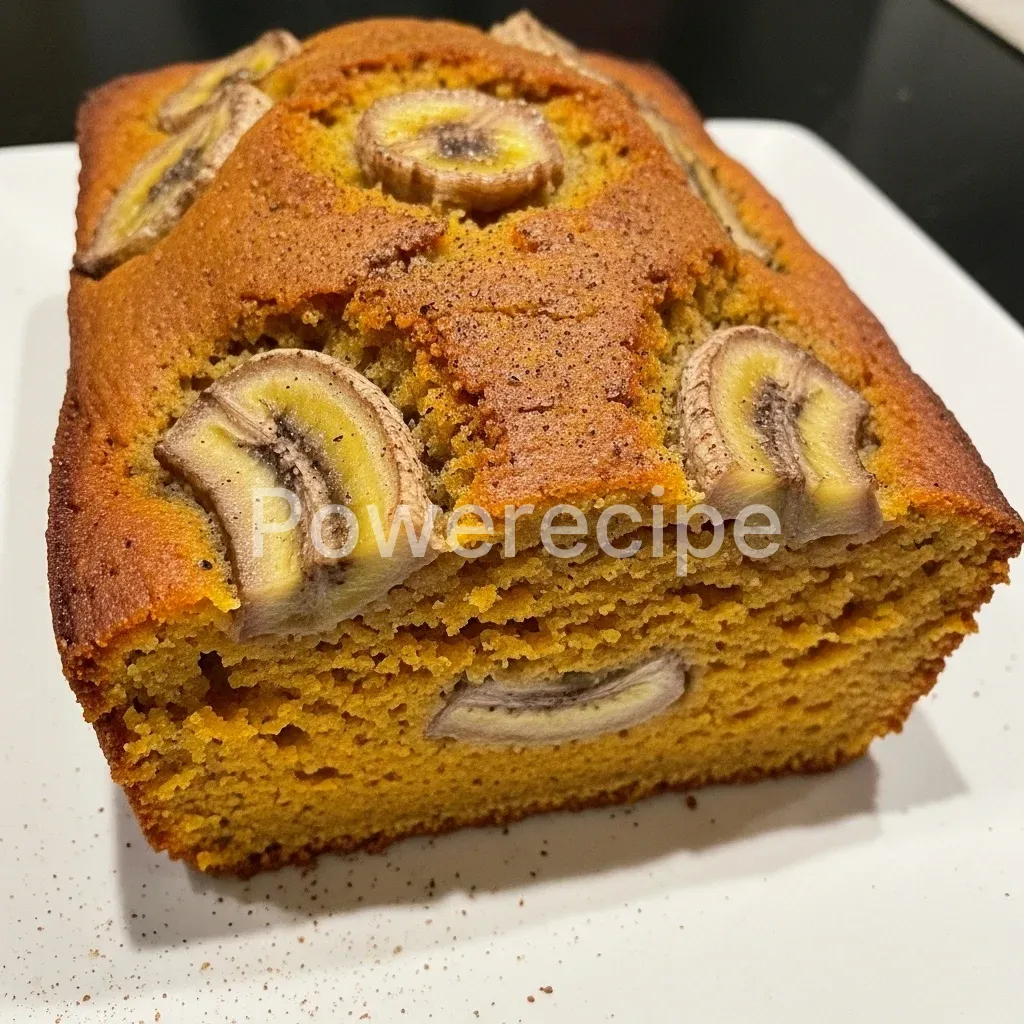
9. Remove and Finish Cooling: Carefully lift the pumpkin banana loaf out of the pan using the parchment paper overhang or invert it onto the wire rack.
Let it cool completely before slicing. This is crucial for a clean slice and the best texture. Enjoy your homemade pumpkin banana loaf!
Pro Tips for Success
Achieving the perfect pumpkin banana loaf every time involves a few simple tricks. I’ve learned these over years of baking for my family.
* Use Very Ripe Bananas: This is perhaps the most important tip for any banana bread, including this pumpkin banana loaf. The browner, the better! Ripe bananas are sweeter and have a stronger banana flavor, contributing significantly to the moisture and taste of your quick bread.
They also mash much more easily.
* Do Not Overmix: Once you combine the wet and dry ingredients, mix just until no dry streaks of flour remain. Overmixing develops gluten, which results in a dense, chewy, and less tender pumpkin banana loaf.
A few lumps are perfectly fine!
* Measure Flour Correctly: Spoon your flour into your measuring cup and then level it off with a straight edge (like a knife). Scooping directly from the bag can compact the flour, leading to too much flour and a dry, crumbly pumpkin banana loaf.
* Pumpkin Puree, Not Pie Filling: Always use 100% pure canned pumpkin puree. Pumpkin pie filling contains added sugars and spices that will alter the flavor and sweetness of your pumpkin banana loaf. Check the label carefully.
* Even Baking: To help your pumpkin banana loaf bake evenly and prevent a raw center, sometimes I’ll tent the top loosely with aluminum foil for the last 15-20 minutes of baking if the top is browning too quickly.
* Test for Doneness: The toothpick test is your best friend. Insert a wooden skewer into the very center of the loaf.
If it comes out clean or with moist crumbs attached, your pumpkin banana loaf is ready. If it has wet batter, bake for a few more minutes.
* Cool Completely: While tempting to slice right away, let your pumpkin banana loaf cool completely on a wire rack.
This allows the internal structure to set, resulting in clean slices and a better overall texture. A warm slice is still delicious, of course, but for picture-perfect pieces, patience pays off.
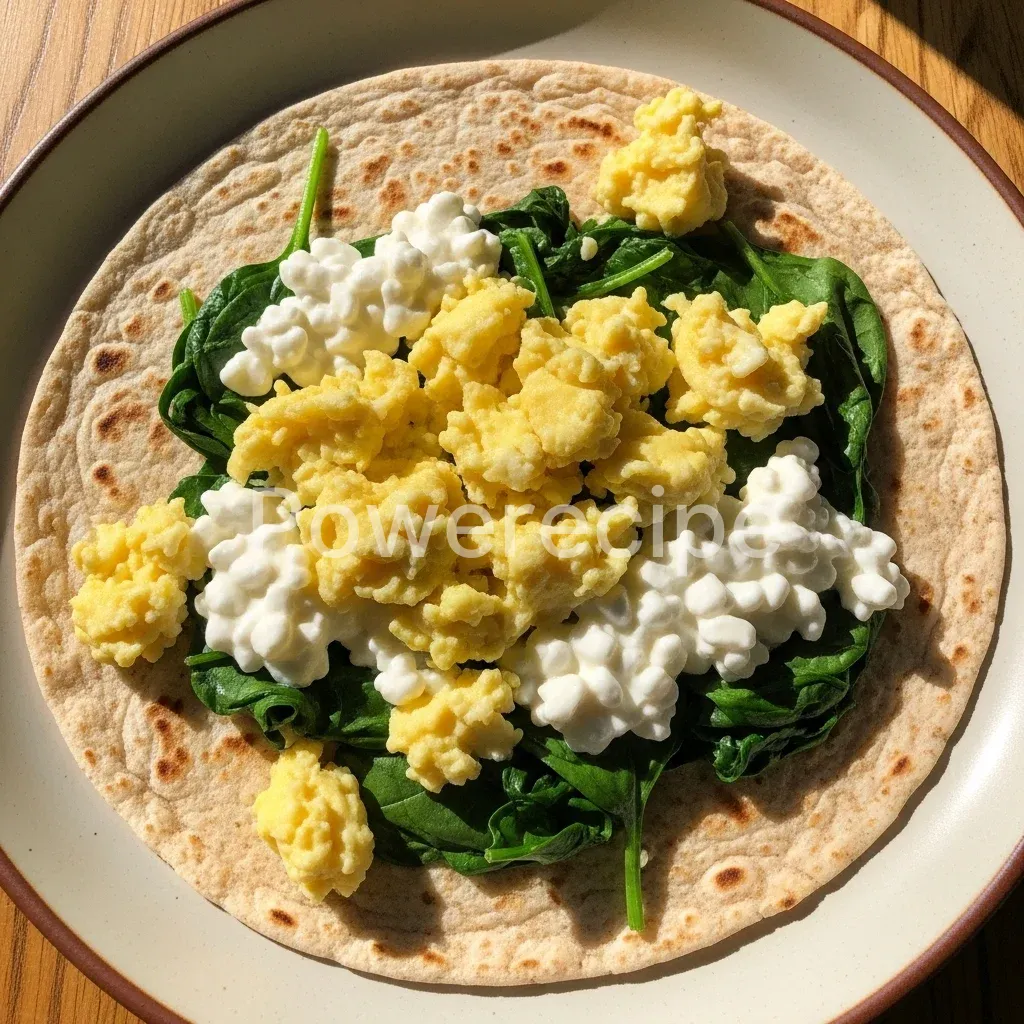
Just as perfectly ripe bananas are essential for this quick bread’s moisture and flavor, finding efficient ways to fuel your mornings is always a win. If you’re seeking another straightforward, protein-packed breakfast option that’s ready in minutes, don’t miss our delicious egg spinach cottage cheese tortilla.
Storage & Reheating Tips
You’ve baked a wonderful pumpkin banana loaf, and now you want to keep it fresh! Proper storage ensures you can enjoy its deliciousness for days.
* Room Temperature: Store the cooled pumpkin banana loaf tightly wrapped in plastic wrap or aluminum foil, or in an airtight container, at room temperature for up to 3-4 days. This keeps it moist and flavorful.
* Refrigerator: If you live in a very warm climate, or if your pumpkin banana loaf contains ingredients like cream cheese frosting, refrigerate it.
Wrap it tightly and it will last for up to a week. Bring slices to room temperature before serving for the best flavor.
* Freezing for Longer Storage: This pumpkin banana loaf freezes beautifully!
* Whole Loaf: Once completely cooled, wrap the entire loaf tightly in plastic wrap, then an additional layer of aluminum foil. Label with the date. It will stay fresh for up to 3 months.
* Individual Slices: For easy grab-and-go portions, slice the cooled pumpkin banana loaf first. Layer the slices with parchment paper in between, then place them in an airtight freezer-safe bag or container. This is perfect for breakfast or snacks.
* Thawing:
* Whole Loaf: Thaw wrapped pumpkin banana loaf at room temperature for several hours or overnight.
* Slices: Thaw individual slices at room temperature for about 30 minutes, or gently warm them in the microwave or toaster oven.
* Reheating: To warm a slice of pumpkin banana loaf, you can microwave it for 15-30 seconds, or toast it gently in a toaster oven. This brings out those lovely spices and creates a soft texture, making it feel freshly baked again.
What to Serve With This Recipe
This versatile pumpkin banana loaf pairs wonderfully with so many things! It’s truly a flexible recipe that fits into any meal of the day.
* Breakfast Bliss:
* Coffee or Tea: A warm slice of pumpkin banana loaf with your favorite hot beverage is the ultimate cozy start to the day.
* Yogurt and Granola: Serve a slice alongside a bowl of Greek yogurt and some crunchy granola for a balanced and satisfying breakfast.
* Fresh Fruit: A simple side of berries or sliced apples complements the rich flavors of the pumpkin banana loaf beautifully.
* Snack Time Favorite:
* A Glass of Milk: Pure comfort, especially for the kids!
* Nut Butter: Spread a thin layer of almond butter or peanut butter on a slice for an extra protein boost. The flavors meld perfectly with the pumpkin banana loaf.
* Cream Cheese Frosting: For a more decadent treat, whip up a quick cream cheese frosting to spread on top. It’s absolutely divine with this pumpkin banana loaf.
* Simple Dessert:
* A Scoop of Ice Cream: Vanilla bean or a cinnamon ice cream would be incredible with a slightly warmed slice of pumpkin banana loaf.
* Whipped Cream: A dollop of lightly sweetened whipped cream elevates this simple pumpkin banana loaf into an elegant dessert.
* Drizzle of Caramel Sauce: A touch of caramel adds a sophisticated sweetness.
* With Friends: This pumpkin banana loaf is perfect for potlucks, brunches, or simply sharing with neighbors over a casual chat. It’s always a crowd-pleaser.
While this pumpkin banana loaf is a wonderfully versatile treat, perfect for enjoying with coffee or alongside yogurt, sometimes you need a more decadent option for a special occasion. If you’re looking to elevate your dessert game for parties or celebrations, our ice cream cake recipe is sure to impress.
FAQs
Can I use fresh pumpkin instead of canned?
Yes, you certainly can! If you have fresh pumpkin, roast it until tender, then puree it smoothly. Make sure to drain any excess liquid, as fresh pumpkin can be more watery than canned. Use 1 cup of your homemade pumpkin puree for this pumpkin banana loaf.
What kind of bananas are best for pumpkin banana loaf?
The best bananas are overripe ones with lots of brown spots or even entirely brown skins. These bananas are sweeter, softer, and mash more easily, contributing significantly to the moisture and flavor of your pumpkin banana loaf.
Can I make this recipe into muffins?
Absolutely! This pumpkin banana loaf batter makes excellent muffins. Simply divide the batter among 12-18 greased muffin cups (depending on size).
Bake at 375°F (190°C) for about 18-25 minutes, or until a toothpick inserted into the center comes out clean. Adjust baking time as needed.
Is this pumpkin banana loaf healthy?
While it contains sugar and oil, this pumpkin banana loaf also includes fruit (bananas) and a vegetable (pumpkin), offering some vitamins and fiber. You can make it “healthier” by reducing the sugar slightly, using whole wheat pastry flour, or adding nuts for healthy fats and protein. It’s a wonderful, nourishing treat in moderation.
My loaf looks done on the outside but is raw in the middle. What happened?
This usually means your oven was too hot, causing the outside to cook quickly before the inside had a chance. Try lowering your oven temperature by 25°F (about 15°C) next time. Also, remember to tent the loaf with foil if it browns too quickly.
An accurate oven thermometer can help. Ensure you use the correct size loaf pan as well; a pan that’s too small can lead to a raw middle.
Can I add a glaze to my pumpkin banana loaf?
Definitely! A simple powdered sugar glaze would be delightful. Whisk together 1 cup powdered sugar with 2-3 tablespoons of milk or orange juice and ½ teaspoon vanilla extract until smooth.
Drizzle it over the cooled pumpkin banana loaf. A cream cheese glaze also works beautifully with the pumpkin banana flavors.
Pumpkin banana loaf is a delightful example of a quick bread, a category of baked goods that use leavening agents other than yeast, such as baking powder or baking soda, allowing them to be prepared much more rapidly than traditional yeast breads. This type of loaf perfectly marries the moist, sweet characteristics of traditional banana bread with the earthy, spiced notes of pumpkin, creating a comforting treat ideal for any time of year.
Nutrition Information (per serving)
Please note that these values are estimates and can vary based on specific ingredients, brands, and serving sizes. This calculation assumes 12 servings from one pumpkin banana loaf.
| Nutrient | Amount |
|---|---|
| Calories | 290 kcal |
| Total Fat | 13g |
| Saturated Fat | 2g |
| Cholesterol | 35mg |
| Sodium | 210mg |
| Total Carbohydrates | 40g |
| Dietary Fiber | 2g |
| Total Sugars | 25g |
| Protein | 4g |
pumpkin banana loaf
This incredible pumpkin banana loaf is a comforting, warm hug in a slice, born from a pile of overripe bananas and a half-used can of pumpkin puree. It’s an incredibly easy-to-make quick bread that beautifully blends the sweet earthiness of pumpkin with rich banana flavor, spiced with cinnamon and nutmeg. It creates a moist, tender crumb that melts in your mouth and is perfect for busy mornings, afternoon snacks, or a wholesome dessert. This recipe minimizes food waste by using ripe bananas and offers a healthier-ish alternative to many baked goods, packing in fruit and veggie goodness. It's truly a versatile and delicious treat that's loved by all.
- Prep Time: 20 mins
- Cook Time: 60 mins
- Total Time: 2 hours 20 mins
- Yield: 12 servings
- Category: Quick Bread
- Method: Baking
- Cuisine: American
- Diet: Vegetarian
Ingredients
1 ¾ cups All-purpose flour
½ cup Granulated sugar
½ cup Brown sugar (packed)
1 teaspoon Baking soda
½ teaspoon Salt
1 teaspoon Ground cinnamo
½ teaspoon Ground nutmeg
¼ teaspoon Ground ginger
2 Large eggs, lightly beate
1 cup Canned pumpkin puree (not pumpkin pie filling)
1 cup Ripe mashed bananas (about 2-3 medium)
½ cup Vegetable oil or melted unsalted butter
1 teaspoon Vanilla extract
Instructions
- Preheat your oven to 350°F (175°C). Grease and flour a 9×5-inch loaf pan, or line it with parchment paper, leaving an overhang on the long sides for easy lifting
- In a large bowl, whisk together the all-purpose flour, granulated sugar, brown sugar, baking soda, salt, cinnamon, nutmeg, and ginger. Make sure there are no lumps of brown sugar
- In a separate medium bowl, mash your ripe bananas well with a fork. You want about 1 cup of mashed banana. A few small lumps are perfectly fine
- To the mashed bananas, add the lightly beaten eggs, pumpkin puree, vegetable oil (or melted butter), and vanilla extract. Whisk these wet ingredients together until they are well combined and smooth
- Pour the wet ingredients into the bowl with the dry ingredients. Stir gently with a spatula or wooden spoon until just combined. Be careful not to overmix! If adding any variations like chocolate chips or nuts, fold them in now
- Scrape the batter evenly into your prepared loaf pan. Smooth the top with your spatula
- Place the loaf pan in the preheated oven. Bake for 55-70 minutes, or until a wooden skewer or toothpick inserted into the center of the pumpkin banana loaf comes out clean or with moist crumbs attached
- Once baked, remove the pumpkin banana loaf from the oven. Let it cool in the pan on a wire rack for about 10-15 minutes
- Carefully lift the pumpkin banana loaf out of the pan using the parchment paper overhang or invert it onto the wire rack. Let it cool completely before slicing
Notes
Use Very Ripe Bananas: The browner, the better! Ripe bananas are sweeter, have stronger flavor, and mash more easily, contributing significantly to moisture and taste.
Do Not Overmix: Once wet and dry ingredients are combined, mix just until no dry streaks of flour remain to prevent a dense, chewy loaf. A few lumps are fine.
Measure Flour Correctly: Spoon flour into the measuring cup, then level it off with a straight edge to avoid using too much flour and ending up with a dry, crumbly loaf.
Pumpkin Puree, Not Pie Filling: Always use 100% pure canned pumpkin puree, as pie filling contains added sugars and spices that alter flavor.
Even Baking: If the top browns too quickly, loosely tent the loaf with aluminum foil for the last 15-20 minutes of baking.
Test for Doneness: A wooden skewer inserted into the center should come out clean or with moist crumbs attached.
Cool Completely: Allow the loaf to cool completely on a wire rack before slicing for clean cuts and the best texture.
Storage at Room Temperature: Store the cooled loaf tightly wrapped in plastic wrap or foil, or in an airtight container, for up to 3-4 days.
Freezing for Longer Storage: Once completely cooled, wrap the entire loaf tightly in plastic wrap and then foil, freezing for up to 3 months. For individual portions, slice, layer with parchment paper, and freeze in an airtight bag.
Dairy-Free Option: Use vegetable oil instead of melted butter for a dairy-free loaf.
Gluten-Free Option: Use a 1:1 gluten-free baking flour blend (ensure it contains xanthan gum) for a gluten-free version.
Egg Substitute: Use flax eggs (1 tbsp ground flaxseed meal + 3 tbsp water per egg) or a commercial egg replacer for an egg-free loaf, noting texture may slightly alter.


328 Comments
купить спецтехнику Вольво [url=https://www.tech-group.com.ua]https://www.tech-group.com.ua[/url]
тойота сервис [url=yourmoscow.ru/posts/pokupka-avtomobilja-toiota-s-probegom-chek-list-proverki-i-rekomendacii-po-obsluzhivaniyu.html]тойота сервис[/url]
выбрать спецтехнику Volvo [url=https://www.tech-group.com.ua]https://www.tech-group.com.ua[/url]
купить спецтехнику [url=tech-group.com.ua]tech-group.com.ua[/url]
крипто букмекеры [url=https://mymoscow.forum24.ru/?1-5-0-00003609-000-0-0]крипто букмекеры[/url]
автосервис тойота [url=http://www.proalbea.ru/tojota-v-rossii-posle-2022-goda-kakie-modeli-ostalis.html]автосервис тойота[/url]
букмекерские конторы Литвы [url=https://medium.com/@vit.blagod/%D1%81%D1%82%D0%B0%D0%B2%D0%BA%D0%B8-%D0%BD%D0%B0-%D1%81%D0%BF%D0%BE%D1%80%D1%82-%D0%B2-%D0%BB%D0%B8%D1%82%D0%B2%D0%B5-%D0%BE%D1%81%D0%BE%D0%B1%D0%B5%D0%BD%D0%BD%D0%BE%D1%81%D1%82%D0%B8-%D1%80%D1%8B%D0%BD%D0%BA%D0%B0-%D0%B8-%D0%BF%D0%BE%D0%BF%D1%83%D0%BB%D1%8F%D1%80%D0%BD%D1%8B%D0%B5-%D0%BD%D0%B0%D0%BF%D1%80%D0%B0%D0%B2%D0%BB%D0%B5%D0%BD%D0%B8%D1%8F-702bcfa2a741]букмекерские конторы Литвы[/url]
сервис тойота в москве [url=www.yourmoscow.ru/posts/pokupka-avtomobilja-toiota-s-probegom-chek-list-proverki-i-rekomendacii-po-obsluzhivaniyu.html]сервис тойота в москве[/url]
Лучшие крипто букмекерские конторы [url=https://doskamarta.borda.ru/?1-5-0-00001319-000-0-0]Лучшие крипто букмекерские конторы[/url]
продажа спецтехники Volvo [url=http://www.tech-group.com.ua]http://www.tech-group.com.ua[/url]
сервисный центр тойота [url=http://www.techautoport.ru/news/sezonnoe-to-toyota-kakie-raboty-obyazatelno-vypolnyat-vesnoy-i-osenyu-dlya-nadezhnosti-avtomobilya.html]http://www.techautoport.ru/news/sezonnoe-to-toyota-kakie-raboty-obyazatelno-vypolnyat-vesnoy-i-osenyu-dlya-nadezhnosti-avtomobilya.html[/url]
phuket condos for sale [url=apartments-for-sale-in-phuket-5.com]phuket condos for sale[/url]
крипто букмекерские конторы [url=https://forumsilverstars.forum24.ru/?1-9-0-00000118-000-0-0]крипто букмекерские конторы[/url]
производство кухонь в спб на заказ [url=https://kuhni-spb-61.ru]производство кухонь в спб на заказ[/url]
кухни на заказ спб каталог [url=https://kuhni-spb-59.ru]кухни на заказ спб каталог[/url]
купить заказать кухню [url=https://zakazat-kuhnyu-20.ru]купить заказать кухню[/url]
рулонная штора на заказ цена [url=https://rulonnye-shtory-s-elektroprivodom10.ru]https://rulonnye-shtory-s-elektroprivodom10.ru[/url]
no deposit bonus malaysia [url=https://100cuci-10.com]no deposit bonus malaysia[/url]
фан спорт букмекер [url=https://fanfiction.borda.ru/?1-0-0-00030910-000-0-0]фан спорт букмекер[/url]
apartments for sale phuket thailand [url=https://www.apartments-for-sale-in-phuket-5.com]apartments for sale phuket thailand[/url]
заказ кухни спб [url=https://kuhni-spb-61.ru]заказ кухни спб[/url]
заказать кухню через интернет [url=https://zakazat-kuhnyu-20.ru]заказать кухню через интернет[/url]
100cuci login [url=www.100cuci-10.com]100cuci login[/url]
электрическая рулонная штора [url=https://rulonnye-shtory-s-elektroprivodom10.ru]электрическая рулонная штора[/url]
jili slot malaysia [url=www.100cuci-7.com]jili slot malaysia[/url]
наркологическая помощь на дому в воронеже [url=https://narkolog-na-dom-voronezh-13.ru]https://narkolog-na-dom-voronezh-13.ru[/url]
прямые кухни на заказ от производителя [url=https://kuhni-spb-61.ru]прямые кухни на заказ от производителя[/url]
22bet официальный сайт [url=https://masa.forum24.ru/?1-8-0-00001329-000-0-0]22bet официальный сайт[/url]
condos in phuket for sale [url=https://www.apartments-for-sale-in-phuket-5.com]condos in phuket for sale[/url]
заказать кухню через интернет [url=https://zakazat-kuhnyu-20.ru]заказать кухню через интернет[/url]
электропривод рулонных штор [url=https://rulonnye-shtory-s-elektroprivodom10.ru]электропривод рулонных штор[/url]
большая кухня на заказ [url=https://kuhni-spb-61.ru]большая кухня на заказ[/url]
кухни спб на заказ [url=https://kuhni-spb-59.ru]кухни спб на заказ[/url]
заказать кухню онлайн [url=https://zakazat-kuhnyu-20.ru]заказать кухню онлайн[/url]
100cuci login [url=https://100cuci-7.com]100cuci login[/url]
установить рулонные шторы цена [url=https://rulonnye-shtory-s-elektroprivodom10.ru]https://rulonnye-shtory-s-elektroprivodom10.ru[/url]
thailand phuket apartments for sale [url=https://www.apartments-for-sale-in-phuket-5.com]thailand phuket apartments for sale[/url]
производство кухонь в спб на заказ [url=https://kuhni-spb-61.ru]производство кухонь в спб на заказ[/url]
заказать кухню под заказ [url=https://zakazat-kuhnyu-20.ru]заказать кухню под заказ[/url]
сколько стоит нарколог на дом [url=https://narkolog-na-dom-voronezh-13.ru]сколько стоит нарколог на дом[/url]
cheap phuket apartments for sale [url=apartments-for-sale-in-phuket-5.com]cheap phuket apartments for sale[/url]
вызов нарколога на дом [url=https://narkolog-na-dom-voronezh-12.ru]вызов нарколога на дом[/url]
22bet официальный сайт [url=https://astana.forum24.ru/?1-5-0-00000336-000-0-0]22bet официальный сайт[/url]
наркологическая помощь на дому [url=https://narkolog-na-dom-voronezh-12.ru]наркологическая помощь на дому[/url]
кухни под заказ [url=https://kuhni-spb-58.ru]кухни под заказ[/url]
100cuci no deposit [url=http://100cuci-7.com]100cuci no deposit[/url]
100cuci slot [url=http://www.100cuci-8.com]100cuci slot[/url]
villas for sale phuket thailand [url=https://villas-for-sale-in-phuket-4.com]villas for sale phuket thailand[/url]
вызов нарколога [url=https://narkolog-na-dom-voronezh-12.ru]вызов нарколога[/url]
мебель для кухни спб от производителя [url=https://kuhni-spb-58.ru]https://kuhni-spb-58.ru[/url]
condo for sale in phuket [url=https://apartments-for-sale-in-phuket-4.com]condo for sale in phuket[/url]
стоимость рулонных штор [url=https://elektricheskie-rulonnye-shtory99.ru]стоимость рулонных штор[/url]
врач нарколог на дом [url=https://narkolog-na-dom-voronezh-12.ru]врач нарколог на дом[/url]
villas for sale in thailand phuket [url=https://villas-for-sale-in-phuket-4.com]villas for sale in thailand phuket[/url]
100cuci ios [url=100cuci-8.com]100cuci ios[/url]
прокапать от алкоголя самара [url=https://kapelnicza-ot-pokhmelya-samara-23.ru]прокапать от алкоголя самара[/url]
рулонные шторы крепление на окно [url=https://rulonnye-elektroshtory.ru]https://rulonnye-elektroshtory.ru[/url]
condo for sale in phuket [url=https://apartments-for-sale-in-phuket-4.com]condo for sale in phuket[/url]
вывести из запоя цена [url=https://vyvod-iz-zapoya-na-domu-sankt-peterburg-19.ru]вывести из запоя цена[/url]
кухни спб на заказ [url=https://kuhni-spb-58.ru]кухни спб на заказ[/url]
100cuci login [url=www.100cuci-8.com]100cuci login[/url]
сочетание рулонных рулонные шторы и тюль фото [url=https://elektricheskie-rulonnye-shtory99.ru]https://elektricheskie-rulonnye-shtory99.ru[/url]
luxury villas for sale in phuket [url=https://villas-for-sale-in-phuket-4.com]luxury villas for sale in phuket[/url]
частный нарколог на дом [url=https://narkolog-na-dom-voronezh-12.ru]частный нарколог на дом[/url]
вывод из запоя в стационаре [url=https://vyvod-iz-zapoya-v-staczionare-nizhnij-novgorod-16.ru]вывод из запоя в стационаре[/url]
рулонные жалюзи с электроприводом [url=https://elektricheskie-rulonnye-shtory99.ru]рулонные жалюзи с электроприводом[/url]
кухня по индивидуальному заказу спб [url=https://kuhni-spb-58.ru]https://kuhni-spb-58.ru[/url]
100cuci game list [url=https://100cuci-8.com]100cuci game list[/url]
вывод из запоя в стационаре анонимно [url=https://vyvod-iz-zapoya-v-staczionare-nizhnij-novgorod-16.ru]вывод из запоя в стационаре анонимно[/url]
кухня глория [url=https://kuhni-spb-57.ru]https://kuhni-spb-57.ru[/url]
кухни спб [url=https://kuhni-spb-60.ru]кухни спб[/url]
скачать видео с ютуба в hd 1080p [url=https://skachat-video-s-youtube-10.ru]https://skachat-video-s-youtube-10.ru[/url]
100cuci malaysia [url=http://100cuci-8.com]100cuci malaysia[/url]
вывод из алкогольного запоя нарколог 24 [url=https://vyvod-iz-zapoya-na-domu-sankt-peterburg-19.ru]https://vyvod-iz-zapoya-na-domu-sankt-peterburg-19.ru[/url]
капельница от похмелья нижний новгород [url=https://kapelnicza-ot-pokhmelya-nizhnij-novgorod-7.ru]капельница от похмелья нижний новгород[/url]
сколько стоит съездить в питер на 3 дня на двоих цены [url=https://www.piter-na-teplohode.ru]сколько стоит съездить в питер на 3 дня на двоих цены[/url]
вывод из запоя в стационаре [url=https://vyvod-iz-zapoya-v-staczionare-nizhnij-novgorod-16.ru]вывод из запоя в стационаре[/url]
капельница от алкоголизма [url=https://kapelnicza-ot-pokhmelya-voronezh-14.ru]капельница от алкоголизма[/url]
скачать с ютуба видео в хорошем качестве [url=https://skachat-video-s-youtube-10.ru]https://skachat-video-s-youtube-10.ru[/url]
изготовление кухонь на заказ в санкт петербурге [url=https://kuhni-spb-57.ru]https://kuhni-spb-57.ru[/url]
скачать с ютуба в отличном качестве [url=https://skachat-video-s-youtube-9.ru]https://skachat-video-s-youtube-9.ru[/url]
кухни на заказ от производителя в спб [url=https://kuhni-spb-60.ru]кухни на заказ от производителя в спб[/url]
помощь вывода запоя [url=https://vyvod-iz-zapoya-na-domu-sankt-peterburg-19.ru]помощь вывода запоя[/url]
рулонные шторы на пластиковые окна с электроприводом [url=https://elektricheskie-rulonnye-shtory99.ru]рулонные шторы на пластиковые окна с электроприводом[/url]
турпоездка в питер [url=piter-na-teplohode.ru]турпоездка в питер[/url]
прокапывание от алкоголя на дому [url=https://kapelnicza-ot-pokhmelya-voronezh-14.ru]прокапывание от алкоголя на дому[/url]
кухни спб на заказ [url=https://kuhni-spb-57.ru]кухни спб на заказ[/url]
кухни на заказ спб каталог [url=https://kuhni-spb-60.ru]кухни на заказ спб каталог[/url]
скачать видео youtube по ссылке [url=https://skachat-video-s-youtube-9.ru]скачать видео youtube по ссылке[/url]
вывод из запоя в наркологическом стационаре [url=https://vyvod-iz-zapoya-v-staczionare-nizhnij-novgorod-16.ru]https://vyvod-iz-zapoya-v-staczionare-nizhnij-novgorod-16.ru[/url]
капельница на дому сколько стоит [url=https://kapelnicza-ot-pokhmelya-voronezh-14.ru]капельница на дому сколько стоит[/url]
piter tours [url=www.piter-na-teplohode.ru]www.piter-na-teplohode.ru[/url]
кухни спб на заказ [url=https://kuhni-spb-57.ru]кухни спб на заказ[/url]
скачивать видео с ютуба [url=https://skachat-video-s-youtube-9.ru]https://skachat-video-s-youtube-9.ru[/url]
прокапаться от алкоголя самара цена [url=https://kapelnicza-ot-pokhmelya-samara-29.ru]прокапаться от алкоголя самара цена[/url]
капельница от запоя нижний новгород [url=https://kapelnicza-ot-pokhmelya-nizhnij-novgorod-7.ru]капельница от запоя нижний новгород[/url]
запой помощь [url=https://vyvod-iz-zapoya-na-domu-sankt-peterburg-21.ru]запой помощь[/url]
частный нарколог нижний новгород [url=https://narkolog-na-dom-nizhnij-novgorod-2.ru]частный нарколог нижний новгород[/url]
поставить капельницу от запоя [url=https://kapelnicza-ot-pokhmelya-voronezh-15.ru]поставить капельницу от запоя[/url]
кухни спб [url=https://kuhni-spb-57.ru]https://kuhni-spb-57.ru[/url]
поставить капельницу от запоя на дому цена [url=https://kapelnicza-ot-pokhmelya-samara-29.ru]поставить капельницу от запоя на дому цена[/url]
youtube downloader url [url=https://skachat-video-s-youtube-9.ru]https://skachat-video-s-youtube-9.ru[/url]
прямые кухни на заказ от производителя [url=https://kuhni-spb-60.ru]прямые кухни на заказ от производителя[/url]
капельница от похмелья нижний новгород [url=https://kapelnicza-ot-pokhmelya-nizhnij-novgorod-7.ru]капельница от похмелья нижний новгород[/url]
вывод из алкогольного запоя нарколог 24 [url=https://vyvod-iz-zapoya-na-domu-sankt-peterburg-21.ru]вывод из алкогольного запоя нарколог 24[/url]
заказать кухню в спб от производителя [url=https://kuhni-spb-57.ru]https://kuhni-spb-57.ru[/url]
сколько стоит прокапаться от алкоголя на дому [url=https://kapelnicza-ot-pokhmelya-voronezh-15.ru]сколько стоит прокапаться от алкоголя на дому[/url]
нарколог на дом круглосуточно цены [url=https://narkolog-na-dom-nizhnij-novgorod-2.ru]https://narkolog-na-dom-nizhnij-novgorod-2.ru[/url]
экскурсионный тур в питер на 5 дней с проживанием и питанием [url=piter-na-teplohode.ru]экскурсионный тур в питер на 5 дней с проживанием и питанием[/url]
вывод из запоя на дому [url=https://vyvod-iz-zapoya-na-domu-sankt-peterburg-21.ru]вывод из запоя на дому[/url]
нарколог выездной [url=https://narkolog-na-dom-nizhnij-novgorod-2.ru]нарколог выездной[/url]
двойные рулонные шторы с электроприводом [url=https://elektricheskie-rulonnye-shtory99.ru]двойные рулонные шторы с электроприводом[/url]
скачать видео из ютуб по ссылке [url=https://skachat-video-s-youtube-11.ru]скачать видео из ютуб по ссылке[/url]
прокапаться на дому нижний новгород [url=https://kapelnica-ot-zapoya-nizhnij-novgorod-8.ru]прокапаться на дому нижний новгород[/url]
дом запой цена [url=https://kapelnicza-ot-pokhmelya-samara-29.ru]дом запой цена[/url]
капельница от похмелья недорого [url=https://kapelnicza-ot-pokhmelya-voronezh-16.ru]капельница от похмелья недорого[/url]
врача капельницу от запоя [url=https://kapelnicza-ot-pokhmelya-ekaterinburg-17.ru]врача капельницу от запоя[/url]
сколько стоит поставить капельницу в екатеринбурге [url=https://kapelnicza-ot-pokhmelya-ekaterinburg-14.ru]https://kapelnicza-ot-pokhmelya-ekaterinburg-14.ru[/url]
нарколог на дом отзывы [url=https://narkolog-na-dom-voronezh-14.ru]нарколог на дом отзывы[/url]
рольшторы с электроприводом [url=https://elektricheskie-rulonnye-shtory99.ru]рольшторы с электроприводом[/url]
нарколог домой [url=https://narkolog-na-dom-nizhnij-novgorod-2.ru]https://narkolog-na-dom-nizhnij-novgorod-2.ru[/url]
вызов нарколога на дом воронеж [url=https://narkolog-na-dom-voronezh-10.ru]вызов нарколога на дом воронеж[/url]
скачать видео из ютуба онлайн [url=https://skachat-video-s-youtube-11.ru]скачать видео из ютуба онлайн[/url]
прокапаться от алкоголя цена [url=https://kapelnicza-ot-pokhmelya-voronezh-16.ru]прокапаться от алкоголя цена[/url]
наркологическая помощь на дому [url=https://narkolog-na-dom-voronezh-14.ru]наркологическая помощь на дому[/url]
капельница екатеринбург цены [url=https://kapelnicza-ot-pokhmelya-ekaterinburg-17.ru]https://kapelnicza-ot-pokhmelya-ekaterinburg-17.ru[/url]
нарколог на дом цены [url=https://narkolog-na-dom-nizhnij-novgorod-2.ru]https://narkolog-na-dom-nizhnij-novgorod-2.ru[/url]
нарколога домой [url=https://narkolog-na-dom-voronezh-10.ru]https://narkolog-na-dom-voronezh-10.ru[/url]
рулонные шторы кухню цена [url=https://elektricheskie-rulonnye-shtory99.ru]https://elektricheskie-rulonnye-shtory99.ru[/url]
вывод из запоя спб [url=https://vyvod-iz-zapoya-na-domu-sankt-peterburg-22.ru]https://vyvod-iz-zapoya-na-domu-sankt-peterburg-22.ru[/url]
скачать видео с ютубе [url=https://skachat-video-s-youtube-11.ru]скачать видео с ютубе[/url]
стоимость капельницы на дому екатеринбург [url=https://kapelnicza-ot-pokhmelya-ekaterinburg-14.ru]https://kapelnicza-ot-pokhmelya-ekaterinburg-14.ru[/url]
нарколог на дом цена [url=https://narkolog-na-dom-voronezh-14.ru]нарколог на дом цена[/url]
капельница от запоя на дому круглосуточно [url=https://kapelnicza-ot-pokhmelya-voronezh-16.ru]капельница от запоя на дому круглосуточно[/url]
нарколог на дом срочно [url=https://narkolog-na-dom-nizhnij-novgorod-2.ru]https://narkolog-na-dom-nizhnij-novgorod-2.ru[/url]
готовые рулонные шторы купить в москве [url=https://rulonnye-shtory-s-elektroprivodom17.ru]готовые рулонные шторы купить в москве[/url]
вызов врача нарколога на дом [url=https://narkolog-na-dom-voronezh-10.ru]https://narkolog-na-dom-voronezh-10.ru[/url]
выезд на дом нарколога [url=https://narkolog-na-dom-samara-9.ru]https://narkolog-na-dom-samara-9.ru[/url]
вывод из запоя капельница [url=https://kapelnica-ot-zapoya-nizhnij-novgorod-9.ru]вывод из запоя капельница[/url]
вызвать нарколога [url=https://narkolog-na-dom-voronezh-14.ru]вызвать нарколога[/url]
капельница на дому екатеринбург цены [url=https://kapelnicza-ot-pokhmelya-ekaterinburg-14.ru]https://kapelnicza-ot-pokhmelya-ekaterinburg-14.ru[/url]
врача капельницу от запоя [url=https://kapelnicza-ot-pokhmelya-ekaterinburg-17.ru]врача капельницу от запоя[/url]
рулонные шторы на окно в кухне [url=https://rulonnye-shtory-s-elektroprivodom190.ru]https://rulonnye-shtory-s-elektroprivodom190.ru[/url]
прокапаться на дому от алкоголя цена [url=https://kapelnicza-ot-pokhmelya-voronezh-17.ru]прокапаться на дому от алкоголя цена[/url]
вызов нарколога на дом [url=https://narkolog-na-dom-voronezh-10.ru]вызов нарколога на дом[/url]
ютуб загрузчик онлайн [url=https://skachat-video-s-youtube-11.ru]https://skachat-video-s-youtube-11.ru[/url]
нарколог врач на дом [url=https://narkolog-na-dom-samara-10.ru]https://narkolog-na-dom-samara-10.ru[/url]
вывод из запоя нарколог24 [url=https://vyvod-iz-zapoya-na-domu-sankt-peterburg-22.ru]https://vyvod-iz-zapoya-na-domu-sankt-peterburg-22.ru[/url]
поставить капельницу цена в екатеринбурге [url=https://kapelnicza-ot-pokhmelya-ekaterinburg-14.ru]https://kapelnicza-ot-pokhmelya-ekaterinburg-14.ru[/url]
поставить капельницу на дому екатеринбург цена [url=https://kapelnicza-ot-pokhmelya-ekaterinburg-17.ru]поставить капельницу на дому екатеринбург цена[/url]
капельница от похмелья цена [url=https://kapelnicza-ot-pokhmelya-voronezh-17.ru]капельница от похмелья цена[/url]
вызвать нарколога на дом [url=https://narkolog-na-dom-voronezh-10.ru]вызвать нарколога на дом[/url]
нарколог врач на дом [url=https://narkolog-na-dom-samara-10.ru]https://narkolog-na-dom-samara-10.ru[/url]
наркологический стационар спб [url=https://narkologicheskij-staczionar-sankt-peterburg-10.ru]наркологический стационар спб[/url]
сколько стоит капельница на дому в екатеринбурге [url=https://kapelnicza-ot-pokhmelya-ekaterinburg-14.ru]сколько стоит капельница на дому в екатеринбурге[/url]
частный нарколог на дом [url=https://narkolog-na-dom-voronezh-14.ru]частный нарколог на дом[/url]
вызвать нарколога на дом [url=https://narkolog-na-dom-samara-10.ru]вызвать нарколога на дом[/url]
нарколог на дому [url=https://narkolog-na-dom-samara-9.ru]https://narkolog-na-dom-samara-9.ru[/url]
вывод из запоя в наркологическом стационаре [url=https://vyvod-iz-zapoya-v-staczionare-nizhnij-novgorod-17.ru]https://vyvod-iz-zapoya-v-staczionare-nizhnij-novgorod-17.ru[/url]
вывод из запоя с выездом на дом цена [url=https://vyvod-iz-zapoya-na-domu-ekaterinburg-27.ru]вывод из запоя с выездом на дом цена[/url]
выведение из запоя на дому [url=https://vyvod-iz-zapoya-na-domu-ekaterinburg-30.ru]выведение из запоя на дому[/url]
вызов нарколога на дом москва [url=https://reabilitaciya-alkogolikov-moskva-1.ru]вызов нарколога на дом москва[/url]
рольшторы заказать [url=https://rulonnye-shtory-s-elektroprivodom190.ru]https://rulonnye-shtory-s-elektroprivodom190.ru[/url]
поставить капельницу от запоя на дому цена [url=https://kapelnicza-ot-pokhmelya-samara-32.ru]поставить капельницу от запоя на дому цена[/url]
капельница от похмелья на дому стоимость [url=https://kapelnicza-ot-pokhmelya-voronezh-17.ru]капельница от похмелья на дому стоимость[/url]
круглосуточный вывод из запоя [url=https://vyvod-iz-zapoya-na-domu-ekaterinburg-26.ru]круглосуточный вывод из запоя[/url]
частный нарколог на дом [url=https://narkolog-na-dom-samara-10.ru]частный нарколог на дом[/url]
нарколог на дом вывод из запоя [url=https://narkolog-na-dom-samara-9.ru]нарколог на дом вывод из запоя[/url]
вывод из запоя в стационаре в нижнем новгороде [url=https://vyvod-iz-zapoya-v-staczionare-nizhnij-novgorod-17.ru]https://vyvod-iz-zapoya-v-staczionare-nizhnij-novgorod-17.ru[/url]
рулонные жалюзи с электроприводом [url=https://rulonnye-shtory-s-elektroprivodom190.ru]рулонные жалюзи с электроприводом[/url]
вывод из запоя наркология [url=https://vyvod-iz-zapoya-na-domu-ekaterinburg-30.ru]вывод из запоя наркология[/url]
вывод из запоя цена [url=https://vyvod-iz-zapoya-na-domu-ekaterinburg-27.ru]вывод из запоя цена[/url]
кодирование от алкоголизма стационар [url=https://narkologicheskij-staczionar-sankt-peterburg-10.ru]кодирование от алкоголизма стационар[/url]
вызов нарколога на дом круглосуточно [url=https://reabilitaciya-alkogolikov-moskva-1.ru]вызов нарколога на дом круглосуточно[/url]
нарколог на дом [url=https://narkolog-na-dom-samara-10.ru]нарколог на дом[/url]
нарколог [url=https://narkolog-na-dom-samara-9.ru]нарколог[/url]
вывод из запоя в клинике [url=https://vyvod-iz-zapoya-v-staczionare-nizhnij-novgorod-17.ru]https://vyvod-iz-zapoya-v-staczionare-nizhnij-novgorod-17.ru[/url]
капельница от алкоголя [url=https://kapelnicza-ot-pokhmelya-ekaterinburg-16.ru]капельница от алкоголя[/url]
вывод из запоя цена на дому [url=https://vyvod-iz-zapoya-na-domu-ekaterinburg-30.ru]вывод из запоя цена на дому[/url]
нарколог на дом вывод из запоя [url=https://vyvod-iz-zapoya-na-domu-ekaterinburg-27.ru]нарколог на дом вывод из запоя[/url]
вызов нарколога на дом стоимость [url=https://reabilitaciya-alkogolikov-moskva-1.ru]вызов нарколога на дом стоимость[/url]
выезд на дом капельница от запоя [url=https://kapelnicza-ot-pokhmelya-voronezh-17.ru]выезд на дом капельница от запоя[/url]
карниз с приводом для штор [url=https://elektrokarniz150.ru]https://elektrokarniz150.ru[/url]
нарколог на дому капельница цена [url=https://narkolog-na-dom-samara-10.ru]нарколог на дому капельница цена[/url]
прокапаться на дому [url=https://kapelnicza-ot-pokhmelya-samara-32.ru]прокапаться на дому[/url]
вывод из запоя цены екатеринбург [url=https://vyvod-iz-zapoya-na-domu-ekaterinburg-27.ru]вывод из запоя цены екатеринбург[/url]
100cuci terbaru [url=https://100cuci-9.com]100cuci terbaru[/url]
нарколог москва на дом [url=https://reabilitaciya-alkogolikov-moskva-1.ru]нарколог москва на дом[/url]
карнизы с электроприводом купить [url=https://elektrokarniz150.ru]https://elektrokarniz150.ru[/url]
сколько стоит поставить капельницу в екатеринбурге [url=https://kapelnicza-ot-pokhmelya-ekaterinburg-16.ru]сколько стоит поставить капельницу в екатеринбурге[/url]
капельница от запоя на дому [url=https://kapelnicza-ot-pokhmelya-voronezh-18.ru]капельница от запоя на дому[/url]
luxury real estate phuket [url=https://real-estate-for-sale-in-phuket-2.com]luxury real estate phuket[/url]
вывод из запоя стационар [url=https://vyvod-iz-zapoya-v-staczionare-nizhnij-novgorod-17.ru]вывод из запоя стационар[/url]
выведение из запоя на дому цена [url=https://vyvod-iz-zapoya-na-domu-ekaterinburg-30.ru]выведение из запоя на дому цена[/url]
выведение из запоя телефон [url=https://vyvod-iz-zapoya-na-domu-ekaterinburg-27.ru]выведение из запоя телефон[/url]
no deposit bonus malaysia [url=https://www.100cuci-9.com]no deposit bonus malaysia[/url]
вызвать нарколога на дом срочно [url=https://reabilitaciya-alkogolikov-moskva-1.ru]вызвать нарколога на дом срочно[/url]
наркологические стационары [url=https://narkologicheskij-staczionar-sankt-peterburg-11.ru]наркологические стационары[/url]
электрические гардины для штор [url=https://elektrokarniz150.ru]https://elektrokarniz150.ru[/url]
капельница от запоя на дому круглосуточно [url=https://kapelnicza-ot-pokhmelya-voronezh-18.ru]капельница от запоя на дому круглосуточно[/url]
выведение из запоя екатеринбург [url=https://vyvod-iz-zapoya-na-domu-ekaterinburg-26.ru]выведение из запоя екатеринбург[/url]
наркология вывод из запоя в стационаре [url=https://vyvod-iz-zapoya-v-staczionare-nizhnij-novgorod-17.ru]наркология вывод из запоя в стационаре[/url]
real estate for sale in phuket [url=https://real-estate-for-sale-in-phuket-2.com]real estate for sale in phuket[/url]
вывод из запоя екатеринбург [url=https://vyvod-iz-zapoya-na-domu-ekaterinburg-30.ru]вывод из запоя екатеринбург[/url]
вывести из запоя [url=https://vyvod-iz-zapoya-na-domu-ekaterinburg-27.ru]вывести из запоя[/url]
100cuci mirror [url=https://100cuci-9.com]100cuci mirror[/url]
наркологический стационар спб [url=https://narkologicheskij-staczionar-sankt-peterburg-11.ru]наркологический стационар спб[/url]
вызвать нарколога на дом срочно [url=https://reabilitaciya-alkogolikov-moskva-1.ru]вызвать нарколога на дом срочно[/url]
электрокарниз недорого [url=https://elektrokarniz150.ru]https://elektrokarniz150.ru[/url]
вывести из запоя на дому [url=https://vyvod-iz-zapoya-na-domu-ekaterinburg-26.ru]вывести из запоя на дому[/url]
капельница от алкоголя [url=https://kapelnicza-ot-pokhmelya-ekaterinburg-16.ru]капельница от алкоголя[/url]
real estate for sale in phuket thailand [url=https://real-estate-for-sale-in-phuket-2.com]real estate for sale in phuket thailand[/url]
100cuci safe [url=http://www.100cuci-9.com]100cuci safe[/url]
анонимное лечение алкоголиков [url=https://narkologicheskaya-pomoshh-voronezh-10.ru]https://narkologicheskaya-pomoshh-voronezh-10.ru[/url]
вывод из запоя санкт петербург стационар [url=https://vyvod-iz-zapoya-v-staczionare-sankt-peterburg-27.ru]вывод из запоя санкт петербург стационар[/url]
нарколог срочно [url=https://reabilitaciya-alkogolikov-moskva-3.ru]нарколог срочно[/url]
нарколог на дом екатеринбург [url=https://narkolog-na-dom-ekaterinburg-13.ru]нарколог на дом екатеринбург[/url]
капельница после похмелья [url=https://kapelnicza-ot-pokhmelya-samara-30.ru]капельница после похмелья[/url]
капельница от запоя самара [url=https://kapelnicza-ot-pokhmelya-samara-31.ru]капельница от запоя самара[/url]
вызов врача нарколога на дом [url=https://reabilitaciya-alkogolikov-moskva-4.ru]вызов врача нарколога на дом[/url]
электрокарниз купить в москве [url=https://elektrokarniz150.ru]электрокарниз купить в москве[/url]
наркологический стационар в санкт петербурге [url=https://narkologicheskij-staczionar-sankt-peterburg-11.ru]наркологический стационар в санкт петербурге[/url]
real estate in phuket [url=https://real-estate-for-sale-in-phuket-2.com]real estate in phuket[/url]
карниз с электроприводом [url=https://elektrokarniz150.ru]карниз с электроприводом[/url]
наркология в воронеже [url=https://narkologicheskaya-pomoshh-voronezh-10.ru]https://narkologicheskaya-pomoshh-voronezh-10.ru[/url]
вывод из запоя в стационаре наркологии [url=https://vyvod-iz-zapoya-v-staczionare-sankt-peterburg-27.ru]вывод из запоя в стационаре наркологии[/url]
вызов наркологической помощи на дом [url=https://narkolog-na-dom-ekaterinburg-13.ru]вызов наркологической помощи на дом[/url]
капельница от запоя [url=https://kapelnicza-ot-pokhmelya-samara-30.ru]капельница от запоя[/url]
вызвать нарколога на дом [url=https://reabilitaciya-alkogolikov-moskva-4.ru]вызвать нарколога на дом[/url]
property for sale in phuket [url=https://real-estate-for-sale-in-phuket-2.com]property for sale in phuket[/url]
рулонные шторы купить москва недорого [url=https://rulonnye-shtory-s-elektroprivodom11.ru]рулонные шторы купить москва недорого[/url]
вызвать нарколога на дом анонимно [url=https://narkolog-na-dom-ekaterinburg-13.ru]вызвать нарколога на дом анонимно[/url]
реабилитация наркозависимых стационар [url=https://narkologicheskij-staczionar-sankt-peterburg-14.ru]реабилитация наркозависимых стационар[/url]
прокапаться от алкоголя самара цена [url=https://kapelnicza-ot-pokhmelya-samara-30.ru]прокапаться от алкоголя самара цена[/url]
вызвать врача нарколога на дом москва [url=https://reabilitaciya-alkogolikov-moskva-4.ru]вызвать врача нарколога на дом москва[/url]
капельница от запоя вызов [url=https://kapelnicza-ot-pokhmelya-samara-31.ru]капельница от запоя вызов[/url]
частная наркологическая помощь [url=https://narkologicheskaya-pomoshh-voronezh-10.ru]https://narkologicheskaya-pomoshh-voronezh-10.ru[/url]
круглосуточный стационар вывод из запоя [url=https://vyvod-iz-zapoya-v-staczionare-sankt-peterburg-27.ru]круглосуточный стационар вывод из запоя[/url]
phuket property for sale [url=https://real-estate-for-sale-in-phuket-2.com]phuket property for sale[/url]
нарколог на дом екатеринбург цены [url=https://narkolog-na-dom-ekaterinburg-13.ru]нарколог на дом екатеринбург цены[/url]
наркологический стационар в спб [url=https://narkologicheskij-staczionar-sankt-peterburg-14.ru]наркологический стационар в спб[/url]
врач капельница алкоголь [url=https://kapelnicza-ot-pokhmelya-samara-31.ru]врач капельница алкоголь[/url]
капельница от похмелья клиника [url=https://kapelnicza-ot-pokhmelya-samara-30.ru]капельница от похмелья клиника[/url]
нарколог на дом срочно [url=https://reabilitaciya-alkogolikov-moskva-4.ru]нарколог на дом срочно[/url]
наркологический центр в воронеже [url=https://narkologicheskaya-pomoshh-voronezh-10.ru]https://narkologicheskaya-pomoshh-voronezh-10.ru[/url]
наркология вывод из запоя в стационаре [url=https://vyvod-iz-zapoya-v-staczionare-sankt-peterburg-27.ru]наркология вывод из запоя в стационаре[/url]
нарколог на дом срочно [url=https://narkolog-na-dom-ekaterinburg-14.ru]нарколог на дом срочно[/url]
iq test [url=http://www.youfro.com/free-brain-training-tools-that-actually-have-evidence-behind-them]iq test[/url]
вызов капельницы на дом [url=https://kapelnicza-ot-pokhmelya-samara-30.ru]вызов капельницы на дом[/url]
вызов нарколога на дом в москве [url=https://reabilitaciya-alkogolikov-moskva-4.ru]вызов нарколога на дом в москве[/url]
скорая наркологическая помощь [url=https://narkologicheskaya-pomoshh-voronezh-10.ru]https://narkologicheskaya-pomoshh-voronezh-10.ru[/url]
врач нарколог на дом [url=https://narkolog-na-dom-ekaterinburg-14.ru]врач нарколог на дом[/url]
вывод из запоя стационар спб [url=https://vyvod-iz-zapoya-v-staczionare-sankt-peterburg-27.ru]вывод из запоя стационар спб[/url]
наркология в воронеже [url=https://narkologicheskaya-pomoshh-voronezh-11.ru]https://narkologicheskaya-pomoshh-voronezh-11.ru[/url]
test your iq [url=tudooknoticias.com.br/decoding-iq-130-and-above-what-the-top-2-looks-like]test your iq[/url]
вызов на дом капельницы от запоя [url=https://kapelnicza-ot-pokhmelya-samara-31.ru]вызов на дом капельницы от запоя[/url]
врач нарколог на дом [url=https://reabilitaciya-alkogolikov-moskva-4.ru]врач нарколог на дом[/url]
сделать капельницу от похмелья [url=https://kapelnicza-ot-pokhmelya-samara-30.ru]сделать капельницу от похмелья[/url]
номер нарколога на дом [url=https://narkolog-na-dom-ekaterinburg-14.ru]номер нарколога на дом[/url]
реабилитация наркозависимых в воронеже [url=https://narkologicheskaya-pomoshh-voronezh-11.ru]https://narkologicheskaya-pomoshh-voronezh-11.ru[/url]
наркологическая служба [url=https://narkologicheskaya-pomoshh-voronezh-10.ru]наркологическая служба[/url]
вывод из запоя стационар спб [url=https://vyvod-iz-zapoya-v-staczionare-sankt-peterburg-27.ru]вывод из запоя стационар спб[/url]
free iq test [url=http://completedoorssydney.com.au/mensa-vs-other-high-iq-societies-whats-actually-different]free iq test[/url]
производитель рулонных штор [url=https://rulonnye-shtory-s-elektroprivodom11.ru]https://rulonnye-shtory-s-elektroprivodom11.ru[/url]
вывести из запоя в стационаре [url=https://vyvod-iz-zapoya-v-staczionare-sankt-peterburg-28.ru]вывести из запоя в стационаре[/url]
клиники по лечению алкоголизма [url=https://vyvod-iz-zapoya-v-staczionare-nizhnij-novgorod-24.ru]клиники по лечению алкоголизма[/url]
нарколога на дом [url=https://narkolog-na-dom-moskva-28.ru]нарколога на дом[/url]
срочная наркологическая помощь [url=https://narkologicheskaya-pomoshh-voronezh-12.ru]срочная наркологическая помощь[/url]
iq test [url=https://vanchuyenkienvang.vn/what-your-reasoning-style-says-about-how-you-think]iq test[/url]
врач нарколог на дом частный [url=https://narkolog-na-dom-moskva-29.ru]врач нарколог на дом частный[/url]
вывод из запоя в стационаре клиника [url=https://vyvod-iz-zapoya-v-staczionare-sankt-peterburg-29.ru]вывод из запоя в стационаре клиника[/url]
анонимное лечение алкоголиков [url=https://narkologicheskaya-pomoshh-voronezh-11.ru]https://narkologicheskaya-pomoshh-voronezh-11.ru[/url]
вывод из запоя нижний новгород [url=https://vyvod-iz-zapoya-v-staczionare-nizhnij-novgorod-24.ru]вывод из запоя нижний новгород[/url]
наркологическая служба на дом [url=https://narkolog-na-dom-moskva-28.ru]наркологическая служба на дом[/url]
нарколог на дому капельница цена [url=https://narkolog-na-dom-moskva-29.ru]нарколог на дому капельница цена[/url]
вывод из запоя спб стационар [url=https://vyvod-iz-zapoya-v-staczionare-sankt-peterburg-28.ru]вывод из запоя спб стационар[/url]
клиника плюс воронеж [url=https://narkologicheskaya-pomoshh-voronezh-12.ru]клиника плюс воронеж[/url]
free iq test with instant results [url=http://www.eraautoutah.com/what-a-20-minute-reasoning-test-can-actually-tell-you]free iq test with instant results[/url]
нарколог домой [url=https://narkolog-na-dom-ekaterinburg-14.ru]нарколог домой[/url]
вывод из запоя на дому телефоны [url=https://narkolog-na-dom-moskva-31.ru]вывод из запоя на дому телефоны[/url]
рулонные шторы с электроприводом и дистанционным управлением [url=https://rulonnye-shtory-s-elektroprivodom11.ru]рулонные шторы с электроприводом и дистанционным управлением[/url]
клиника вывода из запоя со стационаром [url=https://vyvod-iz-zapoya-v-staczionare-sankt-peterburg-28.ru]клиника вывода из запоя со стационаром[/url]
вызов врача на дом нарколога [url=https://narkolog-na-dom-moskva-28.ru]вызов врача на дом нарколога[/url]
скорая анонимная наркологическая помощь [url=https://narkologicheskaya-pomoshh-voronezh-12.ru]скорая анонимная наркологическая помощь[/url]
вывод из запоя доктор на дом [url=https://narkolog-na-dom-moskva-29.ru]вывод из запоя доктор на дом[/url]
нарколог подростковый [url=https://vyvod-iz-zapoya-v-staczionare-nizhnij-novgorod-24.ru]нарколог подростковый[/url]
вывести из алкогольного запоя стационар [url=https://vyvod-iz-zapoya-v-staczionare-sankt-peterburg-29.ru]вывести из алкогольного запоя стационар[/url]
free iq test with instant results [url=https://old.sbu.edu.pk/the-difference-between-speed-and-power-cognitive-tests]free iq test with instant results[/url]
выезд на дом нарколога анонимно [url=https://narkolog-na-dom-moskva-31.ru]выезд на дом нарколога анонимно[/url]
алкоголизм вызов на дом [url=https://narkolog-na-dom-moskva-29.ru]алкоголизм вызов на дом[/url]
вывод из запоя стационар спб [url=https://vyvod-iz-zapoya-v-staczionare-sankt-peterburg-28.ru]вывод из запоя стационар спб[/url]
наркологическая помощь воронеж [url=https://narkologicheskaya-pomoshh-voronezh-12.ru]https://narkologicheskaya-pomoshh-voronezh-12.ru[/url]
вызов врача на дом нарколога [url=https://narkolog-na-dom-moskva-28.ru]вызов врача на дом нарколога[/url]
вывод из запоя санкт петербург стационар [url=https://vyvod-iz-zapoya-v-staczionare-sankt-peterburg-29.ru]вывод из запоя санкт петербург стационар[/url]
закодироваться в нижнем новгороде [url=https://vyvod-iz-zapoya-v-staczionare-nizhnij-novgorod-24.ru]закодироваться в нижнем новгороде[/url]
скорая анонимная наркологическая помощь [url=www.narkologicheskaya-pomoshh-voronezh-13.ru]скорая анонимная наркологическая помощь[/url]
вывод из запоя в стационаре спб [url=https://vyvod-iz-zapoya-v-staczionare-sankt-peterburg-31.ru]вывод из запоя в стационаре спб[/url]
капельница на дому анонимно [url=https://narkolog-na-dom-moskva-29.ru]капельница на дому анонимно[/url]
лечение алкоголизма последних стадий в спб [url=https://vyvod-iz-zapoya-v-staczionare-sankt-peterburg-28.ru]лечение алкоголизма последних стадий в спб[/url]
нарколог лечение на дому [url=https://narkolog-na-dom-moskva-28.ru]нарколог лечение на дому[/url]
наркологический центр [url=https://narkologicheskaya-pomoshh-voronezh-12.ru]наркологический центр[/url]
вывод из запоя санкт-петербург стационар [url=https://vyvod-iz-zapoya-v-staczionare-sankt-peterburg-30.ru]вывод из запоя санкт-петербург стационар[/url]
психиатр нарколог нижний новгород [url=https://vyvod-iz-zapoya-v-staczionare-nizhnij-novgorod-24.ru]психиатр нарколог нижний новгород[/url]
анонимная скорая наркологическая помощь [url=http://narkologicheskaya-pomoshh-voronezh-13.ru]http://narkologicheskaya-pomoshh-voronezh-13.ru[/url]
вывод из запоя в стационаре в санкт петербурге [url=https://vyvod-iz-zapoya-v-staczionare-sankt-peterburg-29.ru]вывод из запоя в стационаре в санкт петербурге[/url]
вывод из запоя в стационаре спб [url=https://vyvod-iz-zapoya-v-staczionare-sankt-peterburg-31.ru]вывод из запоя в стационаре спб[/url]
вывод из наркозависимости на дому [url=https://narkolog-na-dom-moskva-31.ru]вывод из наркозависимости на дому[/url]
рулонные шторы производство [url=https://rulonnye-shtory-s-elektroprivodom11.ru]https://rulonnye-shtory-s-elektroprivodom11.ru[/url]
закодироваться в нижнем новгороде [url=https://vyvod-iz-zapoya-v-staczionare-nizhnij-novgorod-23.ru]закодироваться в нижнем новгороде[/url]
нарколог на дом цена [url=https://narkolog-na-dom-moskva-28.ru]нарколог на дом цена[/url]
наркология в воронеже [url=narkologicheskaya-pomoshh-voronezh-13.ru]narkologicheskaya-pomoshh-voronezh-13.ru[/url]
стационар вывод из запоя [url=https://vyvod-iz-zapoya-v-staczionare-sankt-peterburg-30.ru]стационар вывод из запоя[/url]
нарколог на дом москва [url=https://narkolog-na-dom-moskva-29.ru]нарколог на дом москва[/url]
вывод из запоя в больнице [url=https://vyvod-iz-zapoya-v-staczionare-sankt-peterburg-28.ru]вывод из запоя в больнице[/url]
выход из запоя стационар [url=https://vyvod-iz-zapoya-v-staczionare-sankt-peterburg-31.ru]выход из запоя стационар[/url]
лечение наркомании и алкоголизма [url=https://narkologicheskaya-pomoshh-voronezh-13.ru]https://narkologicheskaya-pomoshh-voronezh-13.ru[/url]
вывод из запоя в стационаре спб [url=https://vyvod-iz-zapoya-v-staczionare-sankt-peterburg-31.ru]вывод из запоя в стационаре спб[/url]
вывод из запоя в стационаре наркологии [url=https://vyvod-iz-zapoya-v-staczionare-sankt-peterburg-31.ru]вывод из запоя в стационаре наркологии[/url]
вывод из запоя спб стационар [url=https://vyvod-iz-zapoya-v-staczionare-sankt-peterburg-31.ru]вывод из запоя спб стационар[/url]
выезд нарколога на дом цена [url=http://www.reabilitaciya-alkogolikov-moskva.ru]http://www.reabilitaciya-alkogolikov-moskva.ru[/url]
вывод из запоя стоимость [url=https://kapelnicza-ot-pokhmelya-samara-28.ru]вывод из запоя стоимость[/url]
прокапывание от алкоголя [url=https://kapelnicza-ot-pokhmelya-nizhnij-novgorod-6.ru]прокапывание от алкоголя[/url]
капельница от алкоголя цена [url=https://kapelnicza-ot-pokhmelya-samara-28.ru]капельница от алкоголя цена[/url]
прокапаться в самарае [url=https://kapelnicza-ot-pokhmelya-samara-28.ru]прокапаться в самарае[/url]
прокапаться после запоя [url=https://kapelnicza-ot-pokhmelya-nizhnij-novgorod-6.ru]прокапаться после запоя[/url]
прокапать от алкоголя нижний новгород [url=https://kapelnicza-ot-pokhmelya-nizhnij-novgorod-6.ru]прокапать от алкоголя нижний новгород[/url]
поставить капельницу от запоя [url=https://kapelnicza-ot-pokhmelya-nizhnij-novgorod-6.ru]поставить капельницу от запоя[/url]
сколько стоит капельница от запоя [url=https://kapelnicza-ot-pokhmelya-nizhnij-novgorod-6.ru]сколько стоит капельница от запоя[/url]