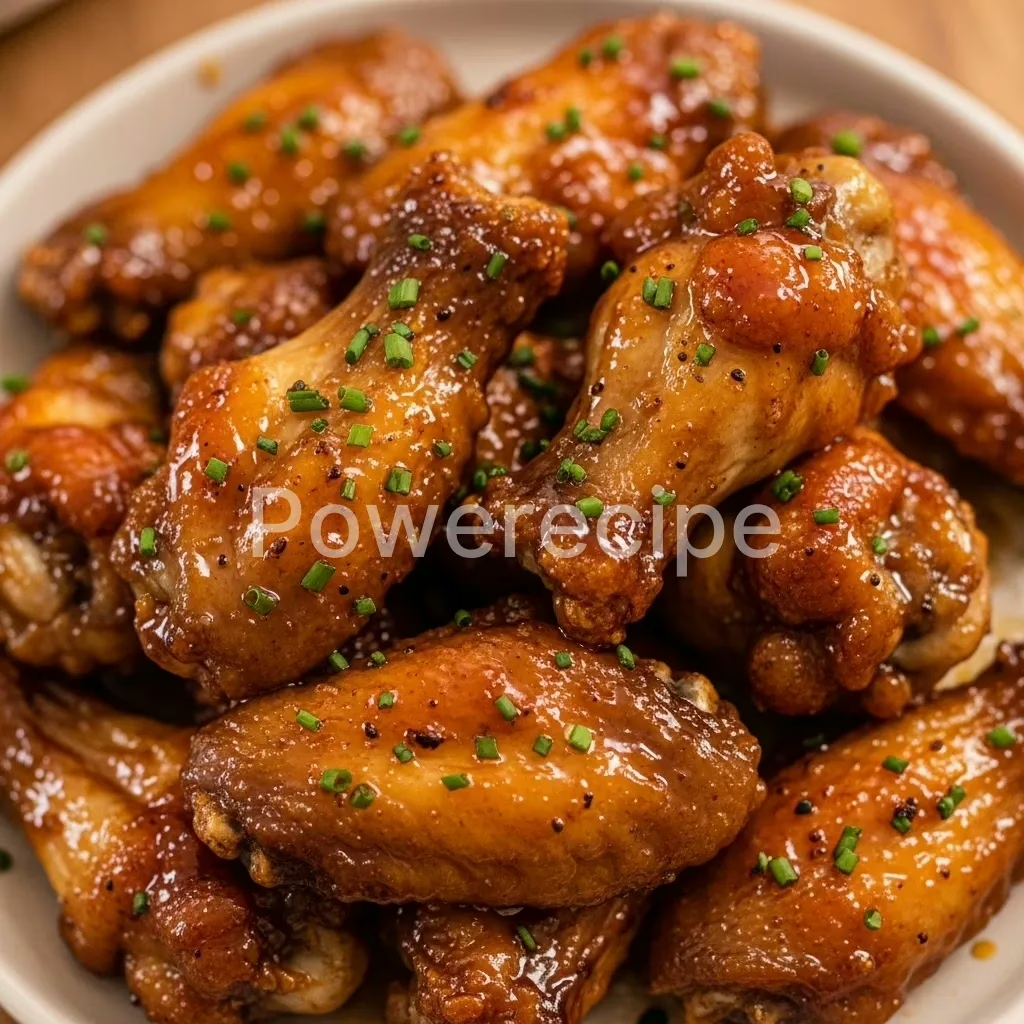
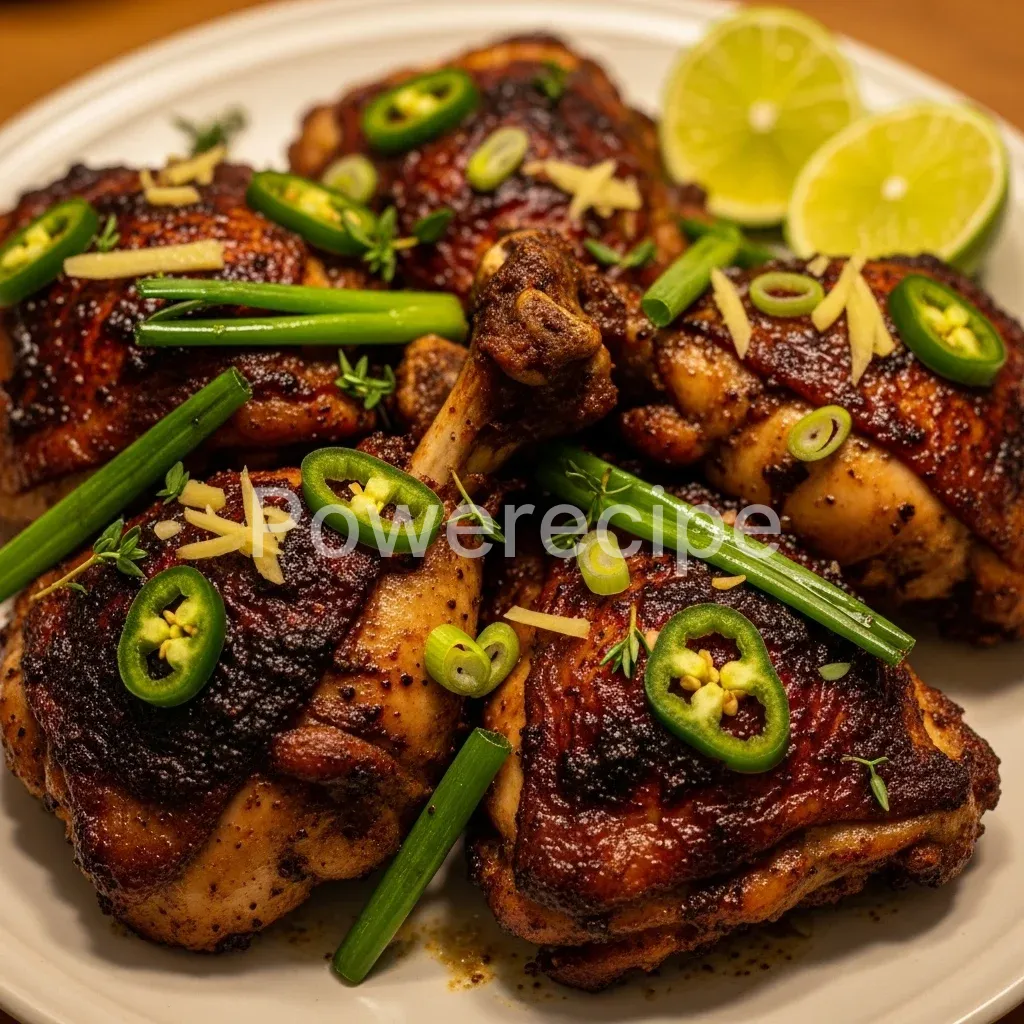
chicken sliders recipe

The doorbell rang for the third time that evening, signaling another wave of hungry teenagers descending upon our kitchen. Between soccer practice, choir rehearsals, and homework, getting a truly nourishing meal on the table that everyone will devour can feel like an Olympic sport. I remember one particularly chaotic Tuesday, staring into the fridge, wondering how I could conjure up something exciting yet simple enough to appease my three hungry kids and their friends.
That’s when inspiration struck: a twist on a classic, something easy to eat, and utterly delicious. That night, the first iteration of my go-to chicken sliders recipe was born.
My kids instantly dubbed them “magic mini sandwiches,” and honestly, they weren’t wrong. These weren’t just any sliders; they were little bundles of joy, packed with flavor and so satisfying. They became our go-to for game nights, spontaneous get-togethers, and even quick weeknight dinners when I needed a win.
There’s something truly special about serving up a dish that brings smiles to everyone’s faces, creating those precious moments around the table, even if it’s a bustling one. This easy chicken sliders recipe embodies everything I believe about food: it’s love, it’s connection, and it doesn’t have to be complicated to be absolutely wonderful. Trust me, once you try these homemade chicken sliders, they’ll become a staple in your family’s meal rotation too.
Why You’ll Love This Easy Chicken Sliders Recipe
You absolutely need this chicken sliders recipe in your life, especially if you juggle a busy household like mine. First, it’s incredibly simple. As a mom of three, I understand the value of a recipe that comes together without a fuss, using ingredients you likely already have on hand. You won’t find any obscure steps or complicated techniques here; just straightforward cooking that delivers amazing results every time.
Furthermore, these sliders are a total crowd-pleaser. Whether you’re feeding picky eaters, hosting a casual gathering, or just looking for a fun weeknight meal, these mini sandwiches vanish quickly. The tender chicken, flavorful sauce, and soft buns create a perfect harmony that appeals to everyone, from toddlers to teenagers to adults. You can easily scale the recipe up or down, making it perfect for any occasion.
Moreover, this recipe offers incredible versatility. While the base is fantastic on its own, you can easily customize it to suit different tastes or dietary needs. Add a little spice, swap out cheeses, or try different buns – the possibilities are endless!
This adaptability makes it a recipe you’ll return to again and again, always finding a fresh twist. Ultimately, you get a delicious, nourishing, and fuss-free meal that brings everyone to the table with happy anticipation. What’s not to love about that?
Ingredients You’ll Need
Gathering your ingredients for this delightful chicken sliders recipe is simple. You likely have many of these staples in your pantry and fridge already. We focus on fresh, accessible items that bring big flavor without any fuss.
| Category | Ingredient | Quantity | Notes |
|---|---|---|---|
| For the Chicken | Boneless, skinless chicken breasts | 1.5 lbs | You can also use chicken thighs for more flavor. |
| Olive oil | 1 tbsp | For sautéing. | |
| Onion powder | 1 tsp | Adds depth. | |
| Garlic powder | 1 tsp | Essential flavor booster. | |
| Smoked paprika | 1/2 tsp | For a subtle smoky kick. | |
| Salt | 1/2 tsp | To taste. | |
| Black pepper | 1/4 tsp | Freshly ground is best. | |
| For the Sauce & Assembly | BBQ sauce | 1/2 cup | Your favorite brand works great. |
| Dijon mustard | 1 tbsp | Adds a tangy complexity. | |
| Honey or maple syrup | 1 tsp | Balances the flavors. | |
| Slider buns (Hawaiian rolls recommended) | 12-pack | Soft and slightly sweet buns are perfect. | |
| Cheddar cheese slices | 6-12 slices | Or your favorite melting cheese. | |
| Butter, melted | 2 tbsp | For brushing the buns. | |
| Sesame seeds | 1 tsp | Optional, for garnish. |
These ingredients come together beautifully to create flavorful, juicy chicken sliders that your family will rave about. Make sure to choose quality ingredients as they truly make a difference in the final taste of your homemade sliders.
Substitutions & Variations
One of the best things about this chicken sliders recipe is its incredible flexibility. You can easily tweak ingredients to suit dietary needs, personal preferences, or just to try something new! Here are some fantastic ideas for substitutions and variations:
Chicken Alternatives:
- Leftover Chicken: Do you have shredded rotisserie chicken or leftover cooked chicken? Fantastic! Simply shred it and toss it with the sauce mixture. This dramatically cuts down cooking time, making these quick chicken sliders even faster.
- Chicken Thighs: For a richer flavor and even juicier results, substitute boneless, skinless chicken thighs for the breasts.
- Ground Chicken: Brown ground chicken in a skillet, drain any excess fat, and then mix with the seasonings and sauce. This offers a different texture that many people enjoy.
Sauce Swaps & Additions:
- BBQ Sauce Variations: Experiment with different types of BBQ sauce – smoky, sweet, spicy, or tangy. A chipotle BBQ sauce will add a lovely kick. You can even make your own homemade BBQ sauce!
- Spicy Kick: Incorporate a dash of hot sauce (like sriracha or Frank’s RedHot) into your chicken mixture for an extra fiery flavor. Chopped jalapeños also work well.
- Creamy Texture: Mix a tablespoon of cream cheese or a dollop of sour cream into the chicken mixture after cooking for a richer, creamier filling.
- Ranch or Buffalo: Ditch the BBQ sauce entirely and toss your cooked, shredded chicken with buffalo sauce and a drizzle of ranch dressing for delicious buffalo chicken sliders.
Cheese Choices:
- While cheddar is classic, feel free to use provolone, Monterey Jack, pepper jack (for spice!), Swiss, or even a creamy Havarti. Anything that melts well works wonders.
Bun Brilliance:
- Gluten-Free: Many brands now offer gluten-free slider buns or dinner rolls that work perfectly.
- Savory Buns: If Hawaiian rolls are too sweet for your liking, use mini brioche buns, potato rolls, or even small dinner rolls for a more savory profile.
Vegetable Boosters:
- Sautéed Veggies: Before adding the chicken, sauté some finely diced bell peppers, shredded carrots, or spinach with your onions for added nutrition and flavor.
- Pickled Goodness: Add a layer of pickled onions, jalapeños, or bread and butter pickles on top of the chicken before adding cheese for an amazing tangy crunch.
Don’t be afraid to get creative with these family-friendly chicken sliders. Each variation offers a slightly different experience, keeping mealtime exciting and delicious!
Step-by-Step Instructions
Creating these delicious chicken sliders recipe is a breeze! Follow these simple steps, and you’ll have a fantastic meal ready in no time. Precision isn’t as important as enthusiasm when you’re making food with love!
- Prepare the chicken: Start by patting your boneless, skinless chicken breasts dry with paper towels. This helps them brown better. Cut the chicken into 1-inch cubes.
- Season the Chicken: In a medium bowl, toss the cubed chicken with olive oil, onion powder, garlic powder, smoked paprika, salt, and black pepper. Make sure every piece is evenly coated.
- Cook the Chicken: Heat a large skillet or non-stick pan over medium-high heat. Add the seasoned chicken in a single layer, making sure not to overcrowd the pan. Cook for 5-7 minutes, flipping halfway through, until the chicken is golden brown and cooked through (internal temperature reaches 165°F / 74°C). Remove the chicken from the skillet and set aside.
- Shred or Cube (Your Choice!): Once slightly cooled, you can either shred the chicken using two forks or simply keep it in small cubes. I often opt for cubes for a bit more texture, but shredding makes it super tender and easy to pile high.
- Prepare the Sauce: In the same skillet (no need to clean it!), combine the BBQ sauce, Dijon mustard, and honey or maple syrup. Stir everything together over medium heat until it simmers gently.
- Combine Chicken and Sauce: Add the cooked chicken back into the skillet with the sauce. Toss everything until the chicken is thoroughly coated in the delicious BBQ mixture. Remove from heat.
- Prepare the Buns: Preheat your oven to 350°F (175°C). Take your slider buns (Hawaiian rolls work best) and carefully slice them horizontally, keeping the top and bottom halves connected if possible. Place the bottom half of the buns in a 9×13 inch baking dish or on a parchment-lined baking sheet.
- Assemble the Sliders: Evenly spread the saucy chicken mixture over the bottom half of the buns.
- Add Cheese: Lay slices of cheddar cheese over the chicken mixture. You can use one large slice cut in half per slider, or smaller squares.
- Top the Sliders: Carefully place the top half of the buns over the cheese layer.
- Butter and Garnish: In a small bowl, melt the butter. Brush the tops of the slider buns generously with the melted butter. Sprinkle with sesame seeds, if using, for an extra touch.
- Bake to Perfection: Cover the baking dish or baking sheet loosely with aluminum foil. Bake for 15 minutes. Then, remove the foil and bake for an additional 5-7 minutes, or until the cheese is melted and bubbly, and the tops of the buns are lightly golden brown.
- Serve Warm: Carefully remove the pan from the oven. Let the sliders cool for a minute or two before slicing them apart and serving.
Enjoy your homemade chicken sliders! They are perfect for any meal or gathering, bringing smiles and full bellies.
Pro Tips for Success
Achieving perfectly delicious chicken sliders recipe every time involves a few simple tricks. These pro tips will elevate your cooking and ensure your sliders are a hit with everyone who tries them.
- Don’t Overcook the Chicken: Chicken breasts can dry out quickly. Cook them just until they are no longer pink inside, reaching an internal temperature of 165°F (74°C). Overcooking will result in tough, dry chicken. Using a meat thermometer truly helps here!
- Sear for Flavor: Ensure your skillet is hot enough before adding the chicken. A good sear develops a delicious crust and locks in juices, adding depth to your family-friendly chicken sliders. Avoid overcrowding the pan; cook the chicken in batches if necessary.
- Keep Buns Connected: When slicing the slider buns horizontally, try to keep the entire block of buns together. This makes assembling the sliders much easier as you can spread the chicken and cheese evenly across the whole slab before putting the top back on.
- Brush with Butter: Don’t skip the melted butter and sesame seeds on top of the buns before baking. This step creates a beautiful golden crust and adds an irresistible richness and flavor to your easy chicken sliders. It makes them look and taste professional!
- Cover for Melty Cheese: Covering the sliders with foil for the first part of baking helps to steam the buns slightly and ensures the cheese melts perfectly without the tops getting too dark too quickly. Remove the foil towards the end to allow the tops to crisp up.
- Let Them Rest: After baking, let the sliders rest for a minute or two before cutting. This allows the cheese to set slightly, making them easier to slice and serve without everything sliding apart.
- Prep Ahead: You can cook the chicken and mix it with the sauce up to a day in advance. Store it in an airtight container in the refrigerator. When ready to bake, simply assemble the sliders and follow the baking instructions. This makes for super quick chicken sliders on a busy weeknight.
- Customize Your Cheese: While cheddar is classic, experiment with other melting cheeses like provolone, Monterey Jack, or even pepper jack for a little heat. Use what your family loves!
Follow these simple tips, and you’ll consistently create the best chicken sliders that everyone will ask you to make again and again!
Storage & Reheating Tips
Having leftovers of this fantastic chicken sliders recipe is rare in our house, but when it does happen, you want to store and reheat them properly to maintain their deliciousness. Here’s how to keep your homemade chicken sliders tasting great for future meals.
Storage:
- Cool Completely: Before storing, allow the cooked sliders to cool down completely to room temperature. Storing warm food can create condensation, leading to soggy buns and quicker spoilage.
- Airtight Container: Transfer the cooled sliders to an airtight container. You can store them as individual sliders or keep them connected in a block if they fit.
- Refrigerate Promptly: Place the container in the refrigerator within two hours of cooking. They will stay fresh for up to 3-4 days.
- Freezing (Optional): While best enjoyed fresh, you can freeze assembled, unbaked sliders for later. Wrap the entire tray of unbaked sliders tightly in plastic wrap, then with aluminum foil. They can last up to 1-2 months. Thaw in the refrigerator overnight before baking. For baked sliders, individual wrapping helps prevent freezer burn.
Reheating:
- Oven for Best Results: For the best quality, especially to prevent soggy buns and ensure melted cheese, reheat your sliders in the oven or a toaster oven.
- Oven Method: Preheat your oven to 300°F (150°C). Place the sliders on a baking sheet, loosely covered with aluminum foil to prevent the buns from drying out too much. Bake for 10-15 minutes, or until heated through and the cheese is re-melted. Remove the foil for the last few minutes if you want crispier tops.
- Toaster Oven: This works great for 1-2 sliders. Set to 300°F (150°C) and bake for 5-10 minutes, checking frequently.
- Microwave (Use with Caution): While quick, the microwave can make the buns soggy and the cheese less appetizing. If you must use it, heat individual sliders for 30-60 seconds on medium power, just until warm. Be prepared for a softer texture.
With these storage and reheating tips, you can enjoy your family-friendly chicken sliders even days after you first make them, ensuring no delicious bite goes to waste!
What to Serve With This Recipe
These chicken sliders recipe make a fantastic main course on their own, but pairing them with the right sides truly completes the meal. As a mom, I always aim for balance, offering some fresh veggies or a lighter option to complement the richness of the sliders. Here are some of our family’s favorite accompaniments that are simple to prepare and universally loved:
- Crispy Oven Fries or Sweet Potato Fries: You can’t go wrong with classic fries! Baking them in the oven requires minimal effort and provides that satisfying crunch. Sweet potato fries add a touch of sweetness and extra nutrients.
- Simple Green Salad: A fresh, crisp green salad with a light vinaigrette perfectly cuts through the richness of the BBQ Chicken. Think mixed greens, cherry tomatoes, cucumber slices, and a simple lemon-herb dressing. It adds a refreshing contrast to your easy chicken sliders.
- Coleslaw: Whether it’s creamy or vinegar-based, coleslaw is a traditional pairing for BBQ and offers a lovely crunch and tangy flavor that complements the sweet and savory sliders beautifully. You can buy pre-made or whip up a quick homemade batch.
- Roasted Vegetables: Toss broccoli florets, zucchini slices, or bell pepper strips with a little olive oil, salt, and pepper, then roast them in the oven alongside your sliders (or before!). It’s an easy, healthy side that adds color and nutrients.
- Corn on the Cob: During warmer months, grilled or boiled corn on the cob is a simple, sweet, and fun side dish that kids adore.
- Fruit Salad: A vibrant bowl of fresh fruit like berries, melon, and grapes offers a sweet and healthy finish to the meal. It’s a great palate cleanser and a refreshing addition to your family-friendly chicken sliders spread.
- Pasta Salad: A quick pasta salad, perhaps with some cherry tomatoes, mozzarella balls, and a light Italian dressing, can be a filling and delicious complement.
Choose one or two of these sides, and you’ll have a complete, satisfying, and delicious meal that everyone at your table will enjoy. These accompaniments truly elevate the experience of eating these homemade chicken sliders.
FAQs About This Delicious Chicken Sliders Recipe
You’ve got questions about this awesome chicken sliders recipe, and I’ve got answers! Here are some common queries to help you master these delightful mini sandwiches.
What kind of chicken works best for chicken sliders?
Boneless, skinless chicken breasts or thighs both work wonderfully for this easy chicken sliders recipe. Chicken breasts offer a leaner option, while thighs provide more flavor and tend to stay juicier. You can cube them, shred them, or even use leftover rotisserie chicken for a super quick meal!
Can I make the chicken mixture ahead of time?
Absolutely! Preparing the chicken and sauce mixture up to 24 hours in advance saves a lot of time on a busy day. Cook the chicken, combine it with the sauce, let it cool completely, and then store it in an airtight container in the refrigerator. When you’re ready to eat, simply assemble the sliders and bake according to the instructions.
How do I prevent the slider buns from getting soggy?
Several tricks help prevent soggy buns. First, make sure your chicken mixture isn’t excessively wet; drain any excess liquid if necessary. Second, ensure the buns are not overly warm when assembling.
Third, lightly toasting the inside of the bottom buns before adding the filling can create a barrier. Finally, brush the tops with butter just before baking for a crispy finish. Covering loosely with foil during the initial bake also helps.
What other cheeses can I use for these homemade chicken sliders?
While cheddar is a classic choice for this family-friendly chicken sliders recipe, feel free to experiment! Provolone, Monterey Jack, Swiss, or even pepper jack for a little kick, all melt beautifully and add their unique flavor profiles. Choose a good melting cheese that your family enjoys.
Can I cook these sliders on a grill?
You can certainly cook the chicken for these sliders on a grill for an added smoky flavor! Grill the seasoned chicken until cooked through, then chop or shred it and toss with the BBQ sauce mixture. For the assembled sliders, you could lightly grill the buttered bun tops for a minute or two, but baking the full slider assembly in a disposable foil pan on indirect heat would work best to melt the cheese without burning the buns.
Printchicken sliders recipe

This easy chicken sliders recipe is a family-favorite, go-to meal for busy weeknights, game nights, or casual gatherings. These 'magic mini sandwiches' feature tender, seasoned chicken tossed in a flavorful BBQ sauce, topped with melted cheese, and served on soft slider buns, often Hawaiian rolls, for a quick, delicious, and satisfying meal that appeals to all ages. It's praised for its simplicity, crowd-pleasing taste, and versatility.
- Prep Time: 20 mins
- Cook Time: 10 mins
- Total Time: 30 mins
- Yield: 4 servings
- Category: Dinner
- Method: Baking
- Cuisine: American
- Diet: Gluten Free
Ingredients
1.5 lbs Boneless, skinless chicken breasts
1 tbsp Olive oil
1 tsp Onion powder
1 tsp Garlic powder
0.5 tsp Smoked paprika
0.5 tsp Salt
0.25 tsp Black pepper
0.5 cup BBQ sauce
1 tbsp Dijon mustard
1 tsp Honey
12 Slider buns
12 slices Cheddar cheese
2 tbsp Butter, melted
1 tsp Sesame seeds
Instructions
- Prepare the Chicken: Pat chicken breasts dry and cut into 1-inch cubes
- Season the Chicken: In a medium bowl, toss cubed chicken with olive oil, onion powder, garlic powder, smoked paprika, salt, and black pepper, ensuring even coating
- Cook the Chicken: Heat a large skillet over medium-high heat. Add seasoned chicken in a single layer and cook for 5-7 minutes, flipping halfway, until golden brown and cooked through (165°F / 74°C). Remove and set aside
- Shred or Cube: Once slightly cooled, shred chicken using two forks or keep in small cubes
- Prepare the Sauce: In the same skillet, combine BBQ sauce, Dijon mustard, and honey. Stir over medium heat until simmering gently
- Combine Chicken and Sauce: Add cooked chicken back into the skillet with the sauce. Toss until thoroughly coated. Remove from heat
- Prepare the Buns: Preheat oven to 350°F (175°C). Slice slider buns horizontally, keeping halves connected. Place the bottom half in a 9×13 inch baking dish or on a parchment-lined baking sheet
- Assemble the Sliders: Evenly spread the saucy chicken mixture over the bottom half of the buns
- Add Cheese: Lay cheddar cheese slices over the chicken mixture
- Top the Sliders: Carefully place the top half of the buns over the cheese layer
- Butter and Garnish: Melt butter and brush generously over the tops of the buns. Sprinkle with sesame seeds, if using
- Bake to Perfection: Cover loosely with aluminum foil and bake for 15 minutes. Remove foil and bake for an additional 5-7 minutes, until cheese is melted and bubbly, and buns are golden brow
- Serve Warm: Let sliders cool for a minute or two before slicing apart and serving
Notes
Don't overcook the chicken; use a meat thermometer to ensure it reaches 165°F (74°C) to keep it juicy.
Keep the block of slider buns connected when slicing for easier assembly.
Brushing the tops of the buns with melted butter and sprinkling with sesame seeds adds richness and a golden crust.
Covering the sliders with foil initially helps cheese melt perfectly without over-browning the buns.
For convenience, cook the chicken and sauce mixture up to a day in advance and store in the refrigerator. Assemble and bake when ready to serve.