Dairy free egg custard
Oh, the magic of a simple dessert! I still remember the comforting aroma of my grandma’s custard wafting through her kitchen. It was pure bliss, a hug in a bowl, especially on those crisp autumn afternoons after school.
But as my own little ones grew and we discovered some dairy sensitivities in our family, that beloved classic became a no-go. My heart ached a little for that lost tradition, for the simple joy of sharing such a timeless treat. I refused to give up, however, knowing that food is love, and love finds a way!
That’s when I started experimenting. I wanted to recreate that same silky texture, that sweet, vanilla-infused flavor, without a single drop of dairy. After many batches and eager taste-testers (my three kiddos are excellent critics!), I finally cracked the code.
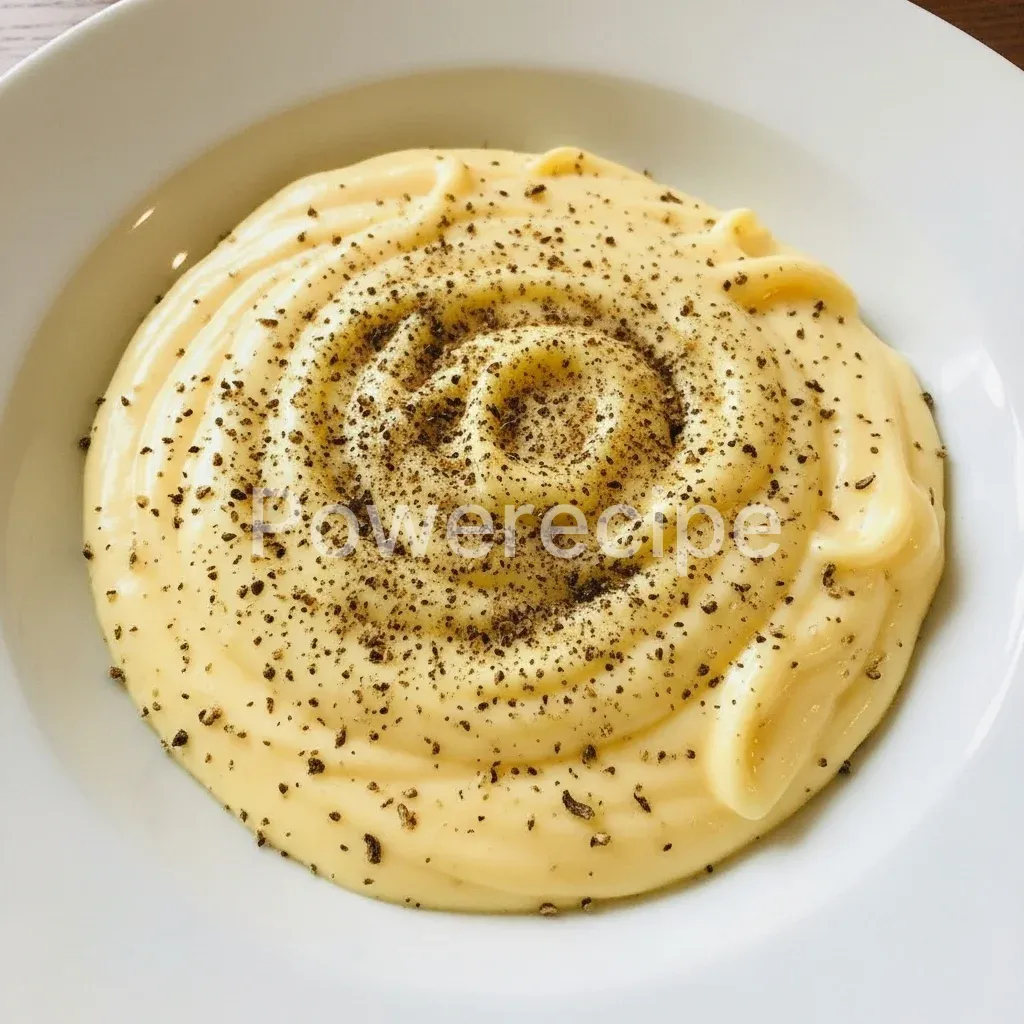
This dairy free egg custard is everything I dreamed it would be: rich, creamy, and wonderfully comforting. It’s become a new family favorite, proving that you can absolutely enjoy classic desserts even with dietary adjustments. Now, every time I whip up a batch of this dairy-free custard, I feel a connection to those cherished memories, creating new ones with my own children around the warmth of a nourishing treat.
This recipe is incredibly simple, relying on wholesome ingredients and straightforward steps. You don’t need fancy equipment, just a little patience and a lot of love. So, whether you’re navigating dairy allergies, choosing a plant-based lifestyle, or simply exploring delicious new recipes, prepare to fall in love with this easy, comforting dairy-free egg custard. It truly brings that classic, soulful dessert experience right back to your table.
Why You’ll Love This Dairy-Free Egg Custard Recipe
You are going to absolutely adore this dairy-free egg custard. First, it brings pure comfort in every spoonful. It delivers that nostalgic, creamy texture and sweet vanilla flavor you remember, completely free of dairy. Therefore, everyone can enjoy it, making it perfect for families with dietary restrictions.
Moreover, this recipe is surprisingly simple to make. You do not need a culinary degree; basic kitchen skills are all you require. Just a few common ingredients come together to create something truly special.
It also feels incredibly nourishing. Made with real eggs and a wholesome plant milk, it offers a satisfying dessert option without artificial Ingredients.
Finally, this dairy-free custard is incredibly versatile. You can enjoy it warm or chilled, plain or with your favorite toppings. It works beautifully as an after-dinner treat, a cozy snack, or even a light breakfast with some fruit.
Its straightforward nature means less time in the kitchen and more time enjoying delicious moments with your loved ones. This recipe transforms a classic into an accessible, delightful experience for everyone.
Ingredients You’ll Need
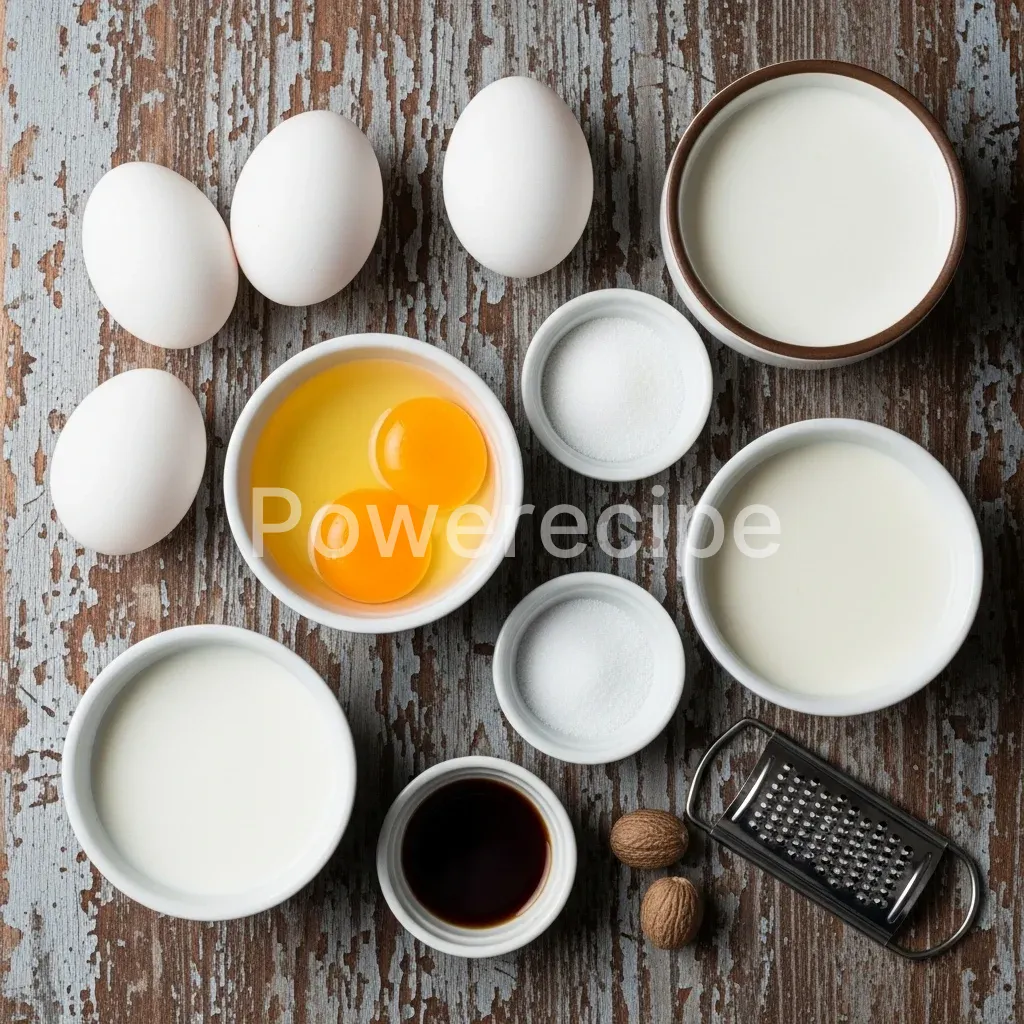
Gathering your ingredients for this dairy-free egg custard recipe is simple. You likely have many of these staples in your pantry already. Each component plays a crucial role in creating that perfect, silky texture and rich flavor.
| Ingredient | Quantity |
|---|---|
| Large Eggs | 4 |
| Egg Yolks | 2 |
| Full-Fat Canned Coconut Milk | 1 (13.5 oz) can |
| Unsweetened Almond Milk | 1 cup |
| Granulated Sugar | 1/2 cup |
| Vanilla Extract | 1 teaspoon |
| Pinch of Salt | 1/4 teaspoon |
| Freshly Grated Nutmeg | For sprinkling |
Using full-fat canned coconut milk is key here; it provides the necessary richness and creaminess that dairy milk typically offers. Unsweetened almond milk lightens the texture slightly without adding extra sweetness. The combination of whole eggs and extra yolks gives the custard a lovely, firm set and velvety mouthfeel.
Sugar sweetens it perfectly, and vanilla extract enhances all the flavors. A tiny pinch of salt balances the sweetness, and freshly grated nutmeg adds that classic, aromatic finish. Ensure all your ingredients are at room temperature for the best results in blending and baking.
Substitutions & Variations
Flexibility is a wonderful thing in the kitchen, especially when dealing with dietary needs or personal preferences. This dairy-free egg custard recipe offers plenty of room for substitutions and exciting variations. You can easily adapt it to suit your taste or what you have on hand.
For the plant milk, while I highly recommend the full-fat coconut milk and almond milk blend for optimal creaminess, you have other options. If you dislike coconut flavor, you can try using a different combination of plant milks. Oat milk, especially a barista-style oat milk, offers a wonderful creaminess.
Hemp milk is another good, neutral-flavored choice. You could also use all almond milk, but expect a slightly less rich, lighter custard. Always opt for unsweetened varieties to control the sugar content yourself.
Regarding sweeteners, granulated sugar works beautifully, but feel free to experiment. Maple syrup or agave nectar can replace some or all of the sugar, but be aware they add a distinct flavor and might slightly alter the liquid ratio. Start with a smaller amount and taste before adding more. For a low-carb option, use a granulated erythritol blend designed for baking; however, results can vary slightly in texture.
Flavor variations are where this dairy-free custard truly shines! Beyond vanilla, consider adding a teaspoon of almond extract for a marzipan-like flavor. A touch of orange zest or lemon zest brightens the custard beautifully.
For a cozy, spiced version, incorporate a quarter teaspoon of ground cinnamon or cardamom along with the nutmeg. You could even infuse your plant milk with a vanilla bean pod or a few star anise pods before making the custard; just remember to strain them out before mixing with the eggs.
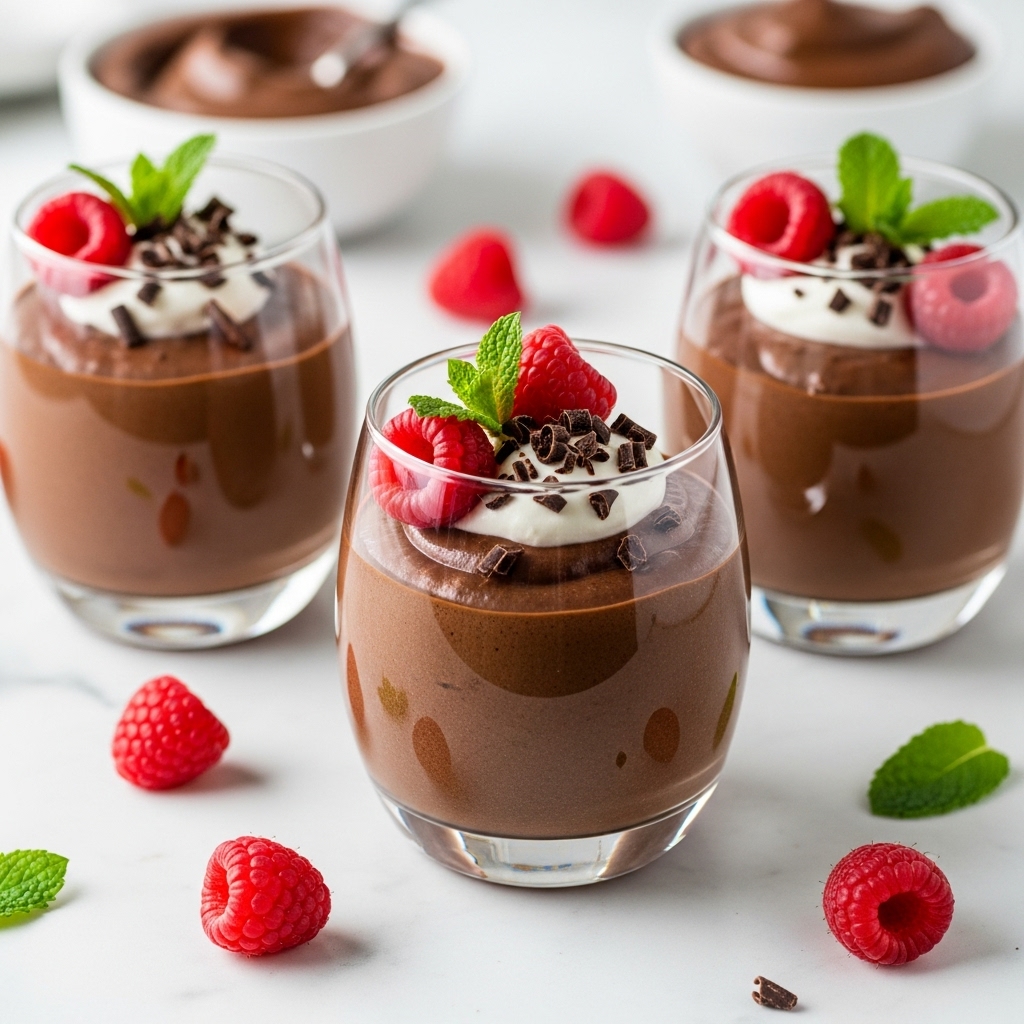
Toppings provide another layer of customization. Fresh berries, like raspberries or blueberries, add a lovely tart contrast. A dollop of homemade coconut whipped cream elevates the dessert significantly.
Shaved dairy-free chocolate or a sprinkle of toasted shredded coconut also make fantastic additions. You can even drizzle it with a homemade berry coulis or a simple caramel sauce made with coconut sugar.
Finally, for a richer custard, you can increase the number of egg yolks by one, omitting one whole egg. This creates an even more luxurious, dense texture. Conversely, for a lighter, more wobbly custard, you could reduce the extra egg yolks to just one.
Remember, these are suggestions, and you should always adjust to your personal preference. This recipe provides a fantastic base for all your creative culinary explorations!
Step-by-Step Instructions
Creating this delicious dairy-free egg custard is a straightforward process. Follow these steps carefully, and you will achieve a perfectly smooth, creamy, and comforting dessert.
- Preheat Oven & Prepare Dish: First, preheat your oven to 325°F (160°C). Then, find a 9-inch pie plate or an equivalent oven-safe dish. You can also use individual ramekins if you prefer. Set this dish aside.
- Prepare Water Bath: Next, select a larger baking pan, like a roasting pan, that your pie plate or ramekins can comfortably fit inside. You will create a water bath, which ensures even, gentle cooking for your custard.
- Whisk Eggs & Yolks: In a large mixing bowl, thoroughly whisk together the 4 large eggs and 2 egg yolks. Whisk until they are light yellow and slightly foamy; this takes about 1-2 minutes. This step breaks down the egg proteins and ensures a smooth custard.
- Heat Plant Milks & Sugar: In a medium saucepan, combine the full-fat canned coconut milk, unsweetened almond milk, granulated sugar, and pinch of salt. Heat the mixture over medium-low heat, stirring constantly, until the sugar completely dissolves and small bubbles form around the edges of the pan. Do not let it boil vigorously.
- Temper the Eggs: This is a crucial step! Slowly, gradually pour about half of the warm milk mixture into the whisked eggs while continuously whisking the eggs. This tempering process slowly raises the temperature of the eggs without scrambling them.
- Combine Mixtures: Now, pour the tempered egg mixture back into the saucepan with the remaining warm milk. Whisk everything together thoroughly until well combined.
- Add Vanilla: Stir in the vanilla extract.
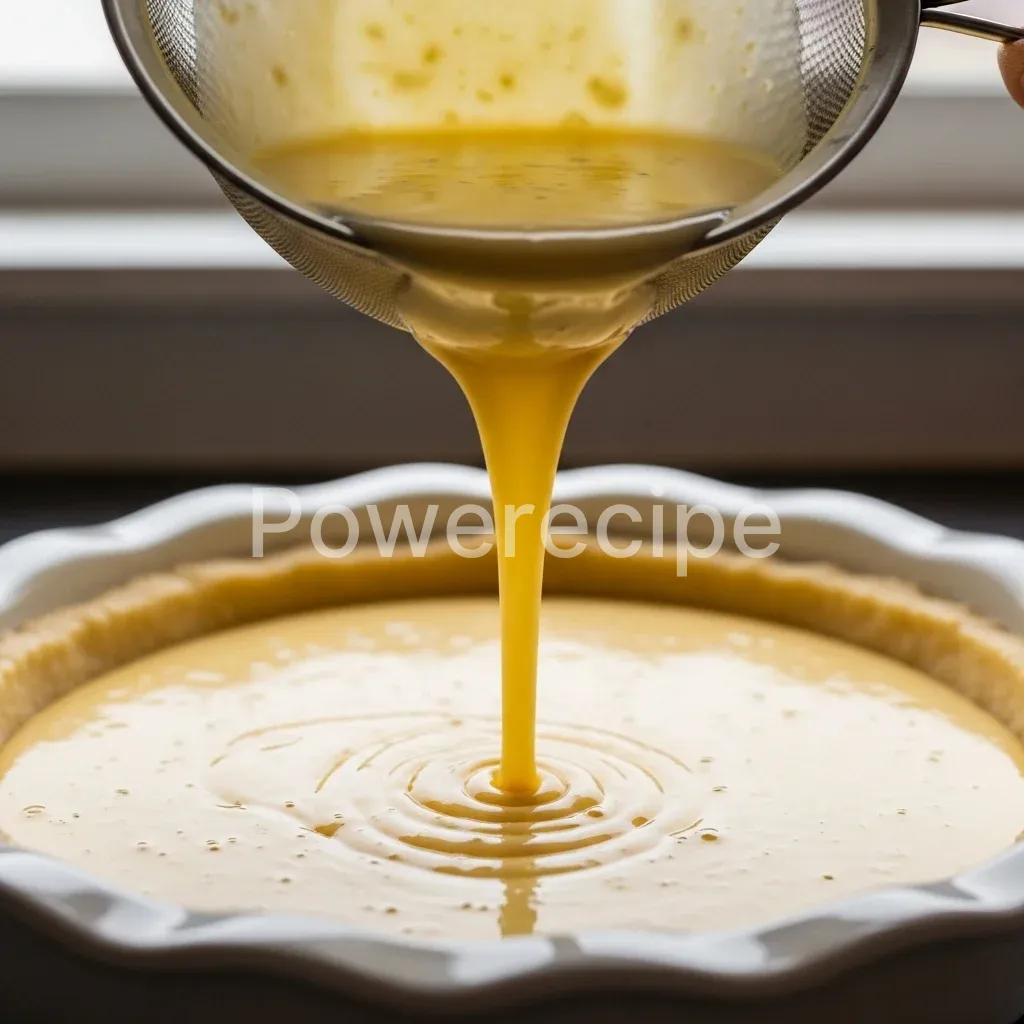
- Strain the Custard Base: For an incredibly smooth custard, pour the entire custard mixture through a fine-mesh sieve into a clean bowl or directly into your prepared pie plate. This removes any bits of cooked egg or undissolved sugar, ensuring a silky texture.
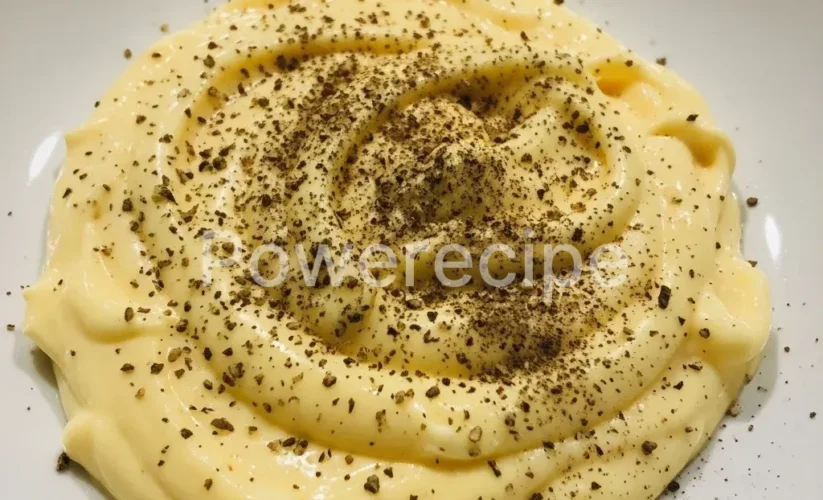
- Pour & Sprinkle Nutmeg: Carefully pour the strained custard mixture into your prepared pie plate or ramekins. Sprinkle the top evenly with freshly grated nutmeg.
- Set Up Water Bath: Carefully place your pie plate or ramekins into the larger baking pan. Then, pour hot water into the larger pan until it comes halfway up the sides of your custard dish(es).
- Bake: Gently transfer the entire water bath setup to your preheated oven. Bake for 45-60 minutes for a large pie plate, or 30-40 minutes for individual ramekins. The custard is ready when the edges appear set, but the center still has a slight jiggle. A knife inserted halfway between the center and the edge should come out clean.
- Cool & Chill: Carefully remove the baking pan from the oven. Let the custard dishes cool in the water bath for about 15-20 minutes. Then, remove the custard from the water bath, let it cool completely on a wire rack at room temperature, and finally, transfer it to the refrigerator. Chill for at least 4 hours, or preferably overnight, before serving. This chilling time allows the custard to fully set and develop its flavors.
Pro Tips for Success
Achieving a perfectly smooth, creamy, and set dairy-free egg custard is incredibly satisfying. These professional tips will help you avoid common pitfalls and ensure your custard turns out beautifully every time.
Firstly, always use room temperature ingredients. Cold eggs and milk take longer to incorporate and can lead to a less uniform batter. Simply take your eggs and plant milks out of the refrigerator about 30 minutes to an hour before you plan to start baking.
Next, temper your eggs properly. This step is non-negotiable for a smooth custard. Pouring hot liquid directly into cold eggs will scramble them.
By slowly drizzling in a portion of the warm milk mixture while constantly whisking, you gently bring the eggs up to temperature. Always keep whisking to prevent the eggs from cooking unevenly.
Furthermore, do not overheat the milk mixture. You want it warm enough to dissolve the sugar, not boiling hot. Scalding milk can impart an off-flavor and makes tempering much harder. Look for small bubbles forming around the edges of the saucepan, then remove it from the heat.
Then, strain the custard mixture. This simple step is a secret weapon for achieving that coveted silky smooth texture. A fine-mesh sieve catches any bits of cooked egg, chalazae (those white stringy bits in eggs), or undissolved sugar. Do not skip this; it makes a significant difference.
The water bath (bain-marie) is your best friend. Custards are delicate, and direct oven heat can make them cook too quickly, leading to a rubbery texture or cracks on the surface. The water bath provides a moist, even heat, allowing the custard to set gently and slowly. Ensure the hot water reaches at least halfway up the sides of your custard dish.
Do not overbake your custard. This is perhaps the most common mistake. Overbaked custard becomes tough and develops an unpleasant texture.
The custard is done when the edges are set, but the center still has a slight jiggle, like gelatin. A thin-bladed knife inserted halfway between the center and edge should come out clean. Remember, it will continue to set as it cools.
Finally, allow ample chilling time. Just like a good relationship, a good custard needs time to fully develop. Chilling for at least 4 hours, and preferably overnight, allows the custard to firm up completely and lets the flavors meld beautifully. Resist the urge to cut into it too soon; patience truly rewards you with perfection.
Storage & Reheating Tips
Once you have enjoyed your initial serving of this delightful dairy-free egg custard, proper storage ensures you can savor the rest later. This custard keeps very well, making it a fantastic make-ahead dessert.
Store any leftover custard in an airtight container in the refrigerator. If you made it in a pie plate, you can tightly cover the plate with plastic wrap or aluminum foil. This prevents the custard from absorbing any refrigerator odors and keeps it fresh. The custard will stay fresh for up to 3-4 days in the refrigerator.
Custard is almost always served chilled, so reheating is generally not necessary or recommended. Reheating can alter its delicate texture, making it more prone to curdling or becoming rubbery. Simply take your custard out of the refrigerator, portion it, and serve. For the best flavor and texture, allow it to sit at room temperature for about 10-15 minutes before serving, if you prefer it not quite ice-cold.
What to Serve With This Recipe
This dairy-free egg custard is a delightful treat on its own, but you can elevate the experience by pairing it with simple, complementary additions. These accompaniments enhance its creamy texture and vanilla flavor beautifully.
Fresh berries are always an excellent choice. Raspberries, blueberries, or sliced strawberries add a burst of freshness and a touch of tartness that cuts through the custard’s richness. A mixed berry compote or a simple berry coulis also makes a vibrant and flavorful topping. You can easily make a dairy-free compote by simmering berries with a little sugar and water until thickened.
For an extra layer of indulgence, serve your custard with a dollop of homemade coconut whipped cream. This provides a light, airy contrast to the dense custard and complements its subtle coconut notes. A sprinkle of toasted shredded coconut or finely chopped nuts, like pecans or almonds, adds a lovely textural crunch.
You can also consider a light drizzle of maple syrup, agave nectar, or a dairy-free caramel sauce. A sprinkle of dairy-free chocolate shavings or a dusting of cocoa powder offers a touch of decadent bitterness. For a simple and comforting pairing, a few dairy-free shortbread cookies or crisp gingersnaps on the side make for a wonderful after-dinner treat. Embrace simplicity; the Custard‘s inherent deliciousness shines with minimal additions.
FAQs
Is this dairy-free egg custard truly healthy?
This dairy-free egg custard uses wholesome ingredients like eggs and plant milk, providing protein and healthy fats. It also contains less processed ingredients than many store-bought desserts. While it contains sugar, you can manage the portion sizes. Therefore, it offers a more nourishing alternative to many conventional sweet treats.
Can I make this dairy-free egg custard ahead of time?
Absolutely! This dairy-free egg custard is an ideal make-ahead dessert. Preparing it the day before serving allows it ample time to chill and fully set, resulting in the best texture and flavor. Simply cover it tightly and store it in the refrigerator until you are ready to serve.
Why did my dairy-free egg custard curdle?
Custard typically curdles due to overcooking or improper tempering of the eggs. If the oven temperature is too high, or you bake it too long, the egg proteins can seize. Not tempering the eggs slowly with the warm milk mixture can also cause them to scramble. Always use a water bath and bake gently until just set.
What’s the best plant milk for dairy-free egg custard?
For the creamiest dairy-free egg custard, a blend of full-fat canned coconut milk and unsweetened almond milk works best. The coconut milk provides richness and body, while the almond milk lightens it slightly. You can also achieve good results with oat milk or a combination of various plant milks, but prioritize full-fat options for a rich texture.
Can I make individual dairy-free egg custards?
Yes, absolutely! Making individual dairy-free egg custards in ramekins is a fantastic idea for portion control and elegant presentation. Simply follow the same instructions, adjusting the baking time down to approximately 30-40 minutes. Ensure the ramekins are also placed in a water bath for even cooking.
Printdairy free egg custard
This dairy-free egg custard is a rich, creamy, and wonderfully comforting classic dessert, reimagined for those with dairy sensitivities. It offers a nostalgic, silky texture and sweet vanilla flavor, made simple with wholesome ingredients and a straightforward baking process. Perfect for families with dietary restrictions, it’s versatile and easy to make, bringing a soulful dessert experience to your table.
- Prep Time: 20 mins
- Cook Time: 60 mins
- Total Time: 7-8 hours (incl. chilling)
- Yield: 8 servings
- Category: Dessert
- Method: Baking
- Cuisine: American
- Diet: Dairy-Free, Gluten Free, Vegetarian
Ingredients
4 Large Eggs
2 Egg Yolks
1 (13.5 oz) can Full-Fat Canned Coconut Milk
1 cup Unsweetened Almond Milk
1/2 cup Granulated Sugar
1 teaspoon Vanilla Extract
1/4 teaspoon Salt
Freshly Grated Nutmeg, for sprinkling
Instructions
- Preheat Oven & Prepare Dish: Preheat your oven to 325°F (160°C). Find a 9-inch pie plate or an equivalent oven-safe dish. Set this dish aside
- Prepare Water Bath: Select a larger baking pan, like a roasting pan, that your pie plate or ramekins can comfortably fit inside. You will create a water bath, which ensures even, gentle cooking for your custard
- Whisk Eggs & Yolks: In a large mixing bowl, thoroughly whisk together the 4 large eggs and 2 egg yolks. Whisk until they are light yellow and slightly foamy; this takes about 1-2 minutes
- Heat Plant Milks & Sugar: In a medium saucepan, combine the full-fat canned coconut milk, unsweetened almond milk, granulated sugar, and salt. Heat the mixture over medium-low heat, stirring constantly, until the sugar completely dissolves and small bubbles form around the edges of the pan. Do not let it boil vigorously
- Temper the Eggs: Slowly, gradually pour about half of the warm milk mixture into the whisked eggs while continuously whisking the eggs. This tempering process slowly raises the temperature of the eggs without scrambling them
- Combine Mixtures: Now, pour the tempered egg mixture back into the saucepan with the remaining warm milk. Whisk everything together thoroughly until well combined
- Add Vanilla: Stir in the vanilla extract
- Strain the Custard Base: For an incredibly smooth custard, pour the entire custard mixture through a fine-mesh sieve into a clean bowl or directly into your prepared pie plate. This removes any bits of cooked egg or undissolved sugar, ensuring a silky texture
- Pour & Sprinkle Nutmeg: Carefully pour the strained custard mixture into your prepared pie plate or ramekins. Sprinkle the top evenly with freshly grated nutmeg
- Set Up Water Bath: Carefully place your pie plate or ramekins into the larger baking pan. Then, pour hot water into the larger pan until it comes halfway up the sides of your custard dish(es)
- Bake: Gently transfer the entire water bath setup to your preheated oven. Bake for 45-60 minutes for a large pie plate, or 30-40 minutes for individual ramekins. The custard is ready when the edges appear set, but the center still has a slight jiggle. A knife inserted halfway between the center and the edge should come out clea
- Cool & Chill: Carefully remove the baking pan from the oven. Let the custard dishes cool in the water bath for about 15-20 minutes. Then, remove the custard from the water bath, let it cool completely on a wire rack at room temperature, and finally, transfer it to the refrigerator. Chill for at least 4 hours, or preferably overnight, before serving. This chilling time allows the custard to fully set and develop its flavors
Notes
Always use room temperature ingredients for best results.
Temper your eggs properly by slowly drizzling in warm milk mixture while constantly whisking to prevent scrambling.
Do not overheat the milk mixture; it should be warm enough to dissolve sugar, not boiling hot.
Strain the custard mixture through a fine-mesh sieve for a silky smooth texture, catching any cooked egg bits or undissolved sugar.
The water bath (bain-marie) provides a moist, even heat, allowing the custard to set gently and prevents rubbery texture or cracks.
Do not overbake; the custard is done when edges are set but the center still has a slight jiggle.
Allow ample chilling time (at least 4 hours, preferably overnight) for the custard to firm up completely and for flavors to meld.
Store any leftover custard in an airtight container in the refrigerator for up to 3-4 days.
Reheating is generally not recommended as it can alter the delicate texture of the custard.