
Best Recipe for Cobbler Using Cherry Pie Filling (Simple & Delicious)
There’s nothing quite as comforting as a warm, gooey cobbler straight from the oven—and if you’re craving something fruity, sweet, and incredibly easy to whip up, this recipe for cobbler using cherry pie filling is the one to bookmark. Whether you’re a seasoned home baker or a total beginner, this guide will walk you through every detail to make a mouthwatering cherry cobbler with minimal prep and maximum flavor.
In this article, we’ll explore everything from the history of cobbler to variations you can try using pantry staples. You’ll learn how to layer your ingredients for that golden, bubbly perfection, plus get insider tips for avoiding soggy bottoms and flavorless crusts. If you’re wondering whether canned pie filling will do the job—don’t worry, we’ve got answers (and hacks!) for that too.
Don’t miss our healthy apple crumble recipe for more fruit-filled dessert ideas.
Let’s get into the cherry goodness!
Understanding the Recipe for Cobbler Using Cherry Pie Filling
What Is a Cobbler? History of Cherry Fruit Cobbler Recipes
A cobbler is a traditional baked dessert made by placing fruit in a baking dish and covering it with batter, biscuit dough, or a crumbly topping before baking. Originating in the United States during colonial times, cobblers became a staple when settlers lacked the resources to make pies. Over time, the dessert evolved into countless regional variations—think southern-style biscuit cobblers, Midwestern crust-topped versions, and even campfire Dutch oven cobblers.
Unlike pies, which require structured crusts, cobblers are more rustic and forgiving. They’re perfect for busy weeknights or impromptu gatherings because they come together quickly and deliver big flavor without the fuss.
Why Cherry Pie Filling Is Ideal for Quick Cobbler Recipes
If you’re looking for convenience without compromising taste, cherry pie filling is a game changer. Here’s why:
- Pre-sweetened & pre-cooked: Canned cherry pie filling is already sweetened and thickened, which saves you time on prep.
- Consistent results: No need to worry about overripe or underripe fruit.
- Great for layering: The texture is ideal for sitting beneath a biscuit or cake-like topping without turning soggy.
Using canned filling also allows you to make this dessert year-round—not just during cherry season. And with just a few tweaks, you can elevate the flavor to rival any homemade version.
Looking for inspiration? Try our gluten-free dessert recipes for more easy bakes like this one.
Ingredients for the Best Recipe for Cherry Cobbler with Pie Filling
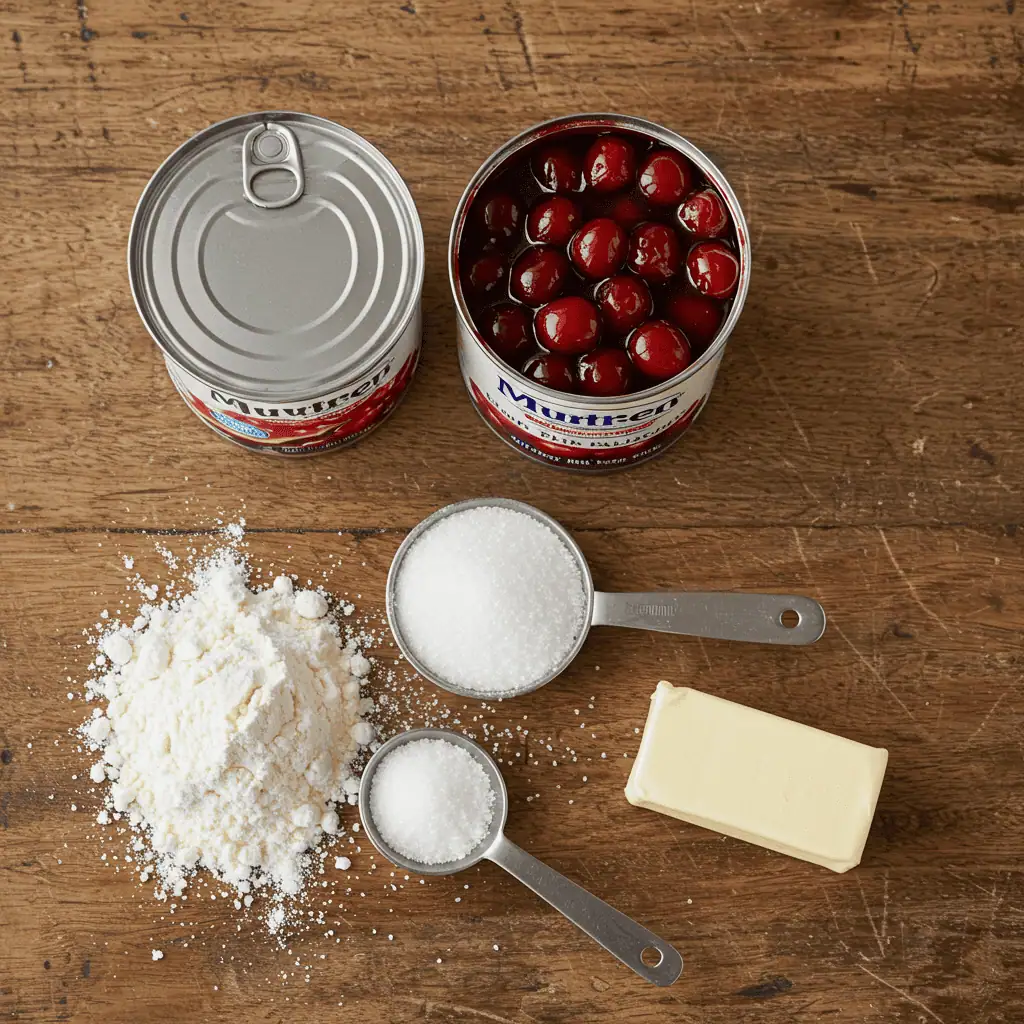
Cherry Pie Filling vs Fresh Cherries in Cobbler Recipes
For this cobbler recipe, cherry pie filling is not only convenient but also consistently delicious. While fresh cherries offer a tart, juicy flavor, they require pitting, cooking, and sweetening. Canned filling, on the other hand, gives you:
- Pre-cooked, thickened consistency
- Balanced sweetness
- Year-round availability
Fresh cherries can still be used if you prefer, but you’ll need to cook them with sugar and a thickener like cornstarch beforehand.
Pantry Ingredients to Make a Simple Cobbler with Canned Cherry Pie Filling
Besides the pie filling, your cobbler will only need a few simple pantry ingredients:
| Ingredient | Purpose |
|---|---|
| All-purpose flour | Base for biscuit or cake topping |
| Granulated sugar | Adds sweetness to the topping |
| Baking powder | Helps the topping rise |
| Butter | Adds richness and golden color |
| Milk or buttermilk | For moisture in the dough |
| Cinnamon or nutmeg (optional) | Adds warm spice notes |
Want to explore more ways to enjoy fruit desserts? Discover great ideas like lemon pudding cake benefits.
How to Make Cherry Cobbler with Pie Filling (Step-by-Step)
Prepping Your Baking Dish & Oven Temperature
Start by preheating your oven to 375°F (190°C). Grease a 9×13-inch baking dish or casserole dish with butter or non-stick spray to prevent sticking.
Assembling the Cobbler: Layering Techniques for Best Texture
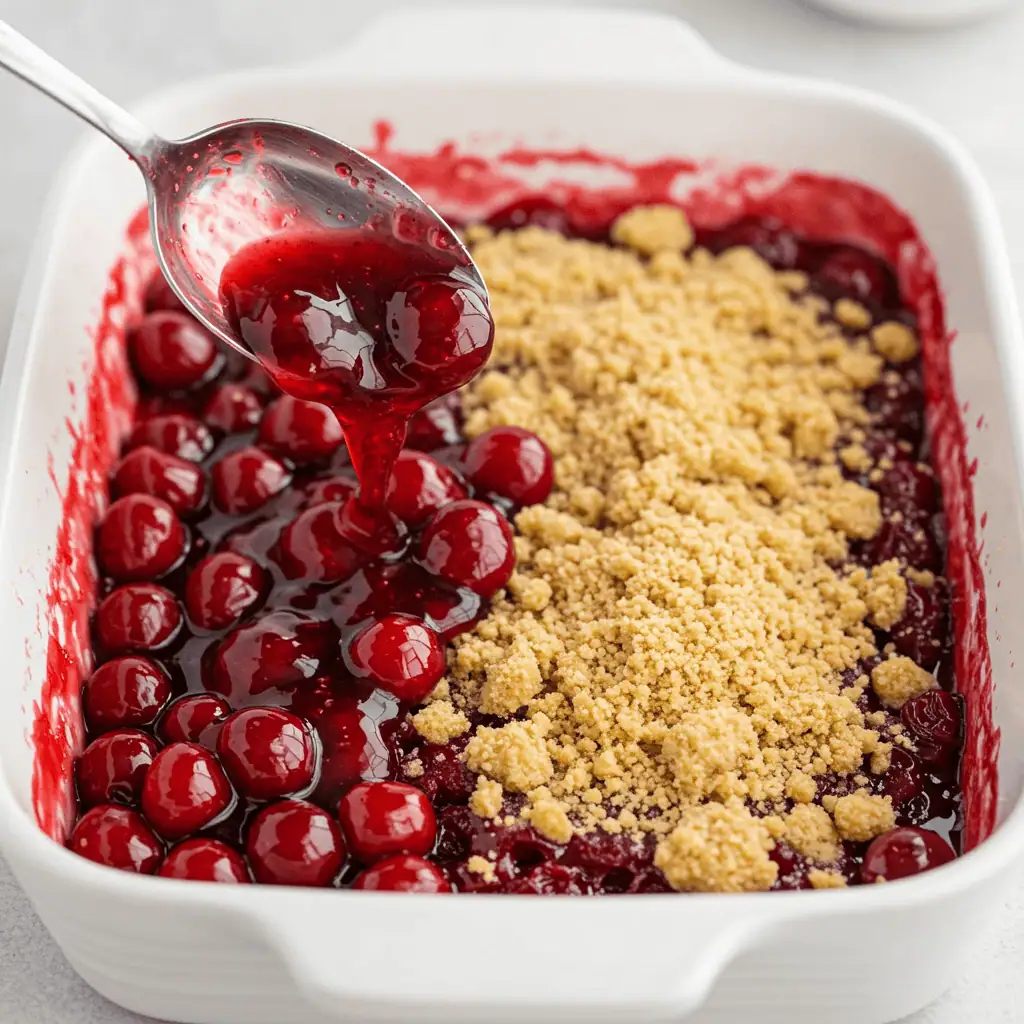
- Spread the cherry pie filling evenly across the bottom of your prepared dish.
- Mix your dry ingredients (flour, sugar, baking powder) in a bowl.
- Add melted butter and milk, stirring until a thick batter forms.
- Spoon the batter over the cherry filling. You can spread it completely or dollop it for a rustic look.
- Sprinkle sugar or cinnamon on top for added crunch.
- Bake for 40–45 minutes, or until golden brown and bubbling at the edges.
Looking for another decadent dessert? Don’t miss our chocolate molten lava cake recipe.
Customizing Your Cherry Cobbler Recipe
Adding Extra Flavors: Almond Extract, Lemon Zest, and More
Want to level up the flavor? Here are a few mix-in ideas:
- Almond extract (½ tsp): enhances cherry flavor
- Lemon zest: balances the sweetness
- Vanilla extract: adds depth to the topping
- Crushed nuts: adds texture and a nutty flavor
Topping Twists: Bisquick, Cake Mix, or Homemade Dough?
This recipe is versatile enough for different topping types:
- Bisquick mix: quick, biscuit-like top
- Cake mix: fluffier and more cakey
- Homemade dough: rich and buttery flavor from scratch
Each offers its own spin on the traditional cobbler.
Baking Tips and Mistakes to Avoid
How to Know When Cobbler Is Perfectly Baked
Look for the following signs:
- The topping is golden brown and puffed
- The cherry filling is bubbling around the edges
- A toothpick inserted into the topping comes out clean
Let it cool for at least 10 minutes before serving to allow it to set properly.
Common Mistakes (And How to Fix Them)
- Undercooked topping: Extend baking by 5-10 minutes and tent with foil.
- Runny filling: Make sure you’re using thickened pie filling or bake a bit longer.
- Overmixing dough: Mix just until combined for a soft, fluffy top.
Serving Suggestions & Pairings
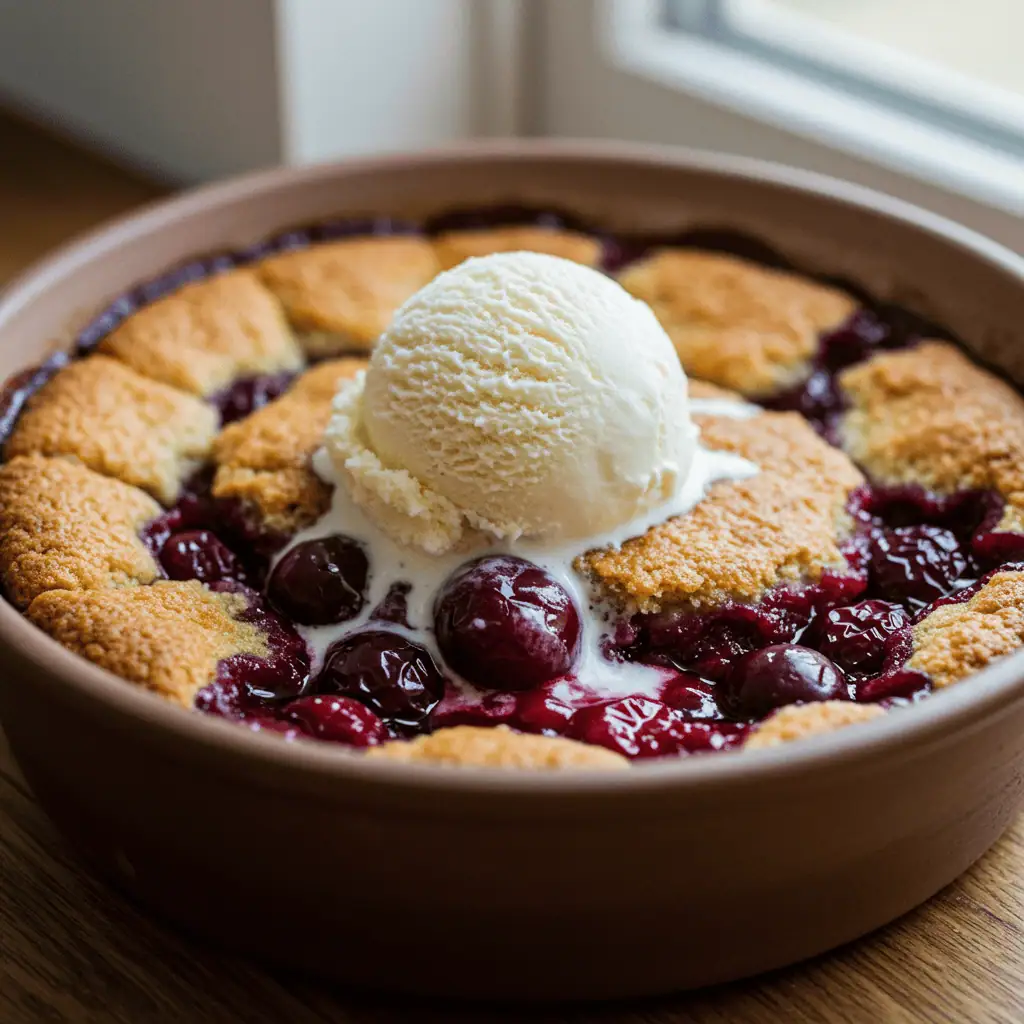
Best Ways to Serve Cherry Cobbler (Ice Cream, Whipped Cream)
Serve warm with:
- A scoop of vanilla ice cream
- A dollop of whipped cream
- A drizzle of sweetened condensed milk or chocolate syrup
These toppings elevate the cherry flavors and add a creamy contrast.
Drinks That Pair Beautifully with Cobbler
Consider these beverages:
- Coffee or chai tea
- Sparkling water with lemon
- A light dessert wine like Moscato or Riesling
Storage, Reheating & Freezing Tips
How to Store Leftover Cobbler Without Getting Soggy
Cool the cobbler completely before covering. Store in an airtight container in the fridge for up to 4 days.
To keep the topping from going soggy, you can reheat it uncovered in the oven at 300°F for 10-15 minutes.
Freezer-Friendly Tips for Future Cravings
Wrap leftover cobbler tightly in plastic wrap and foil. Freeze for up to 2 months. Thaw overnight in the fridge, then reheat in the oven.
Nutritional Information & Substitutions
Is Cobbler Healthier Than Pie? A Nutritional Comparison
| Dessert | Avg Calories | Sugar | Fat |
|---|---|---|---|
| Cherry Pie | 450 | High | High |
| Cherry Cobbler | 300–350 | Medium | Medium |
Cobbler typically uses less crust, meaning fewer calories and less fat.
Gluten-Free, Low-Sugar, and Vegan Substitution Ideas
- Gluten-free flour or almond flour
- Coconut sugar or stevia instead of white sugar
- Plant-based butter and milk
Try our gluten-free dessert roundup for more health-conscious ideas.
FAQs About Cherry Cobbler Using Pie Filling
Can I use pie filling for cobbler?
Absolutely. It’s a time-saving solution that still tastes homemade. Just make sure it’s a thick filling, not watery.
What’s the difference between cherry pie and cherry cobbler?
A pie uses a crust both on the bottom and top, while a cobbler features fruit on the bottom with a biscuit or cake-like topping.
What’s the difference between cobbler and regular pie?
Cobbler is more rustic and simpler—no rolling dough required. It’s layered, not enclosed like a pie.
Do you need to add anything to canned cherry pie filling?
You don’t have to, but enhancing it with lemon zest, almond extract, or a pinch of cinnamon can boost the flavor.
Conclusion
This easy recipe for cobbler using cherry pie filling proves that you don’t need to spend hours in the kitchen to make a homemade dessert that feels special. With just a few pantry ingredients and a can of cherry pie filling, you can have a bubbling, golden treat ready to wow your family or guests.
Looking for inspiration? Try our healthy apple crumble or gluten-free dessert collection for more sweet ideas that satisfy.
Print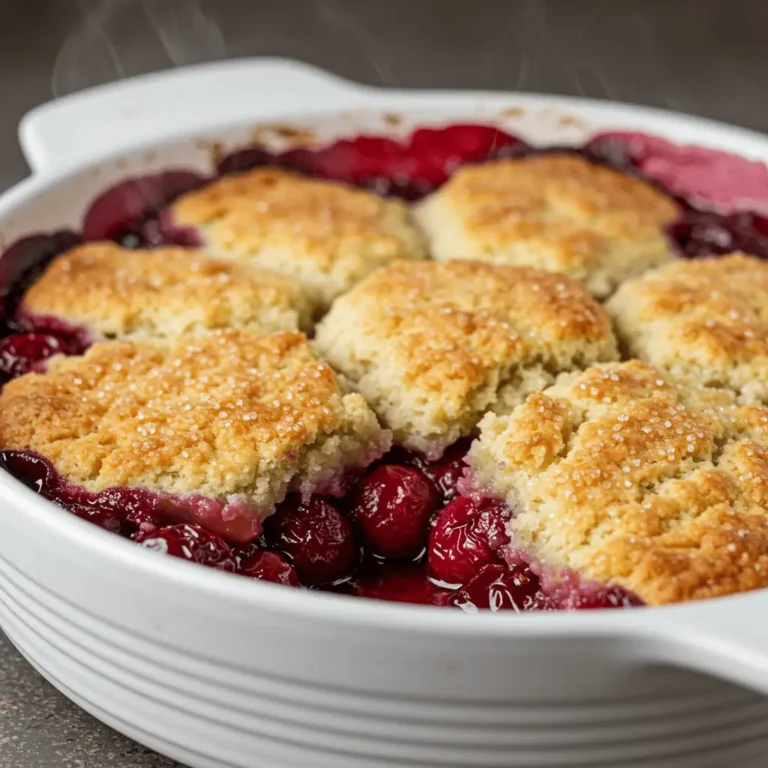
Best Recipe for Cobbler Using Cherry Pie Filling (Simple & Delicious)
This cherry cobbler recipe using canned cherry pie filling is easy, quick, and irresistibly delicious. Perfect for weeknight desserts or holiday gatherings, this cobbler comes together with simple pantry staples and is baked to golden perfection in under an hour.
- Total Time: 55 minutes
- Yield: 8 servings 1x
Ingredients
1 can (21 oz) cherry pie filling
1 cup all-purpose flour
½ cup granulated sugar
1 tsp baking powder
¼ tsp salt
½ cup milk
¼ cup unsalted butter, melted
½ tsp vanilla extract (optional)
½ tsp cinnamon (optional)
1 tbsp coarse sugar (optional for topping)
Instructions
Preheat your oven to 375°F (190°C). Lightly grease a 9×13-inch baking dish.
Spread the cherry pie filling evenly into the dish.
In a bowl, mix together flour, sugar, baking powder, and salt.
Add milk, melted butter, and vanilla extract (if using) and stir until just combined.
Spoon the batter over the cherry filling. Don’t worry about covering every spot—gaps are fine.
Optionally sprinkle cinnamon and coarse sugar on top.
Bake for 40–45 minutes, or until the topping is golden brown and filling is bubbling.
Let cool for 10–15 minutes before serving.
Notes
For extra flavor, add a splash of almond extract to the cherry filling.
Make it vegan: Use plant-based milk and vegan butter.
To store: Cover and refrigerate for up to 4 days.
To freeze: Wrap tightly and freeze up to 2 months. Reheat in oven.
- Prep Time: 10 minutes
- Cook Time: 45 minutes
- Category: Dessert
- Method: Baking
- Cuisine: American
Nutrition
- Serving Size: 1 slice
- Calories: 290 kcal
- Sugar: 22g
- Sodium: 180mg
- Fat: 10g
- Saturated Fat: 6g
- Unsaturated Fat: 3g
- Trans Fat: 0g
- Carbohydrates: 44g
- Fiber: 1g
- Protein: 3g
- Cholesterol: 25mg